Editor's note: This text-based course is a transcript of the webinar, Switch Assessment: Determining Optimal Switch Type and Placement, presented by Michelle Lange, OTR, ABDA, ATP/SMS.
Learning Outcomes
- After this course, participants will be able to:
- Evaluate a hierarchy of possible switch sites for access to assistive technology.
- Analyze clinical indicators for specific switch sites.
- Analyze 3 types of mechanical and electrical switches.
What We Will Be Covering Today
- Switch Assessment
- Switch Site Hierarchy
- Switch Types
- Mechanical
- Electrical
This presentation will cover the key components of comprehensive switch assessment. First, we will discuss what switch assessment entails and what factors to consider when evaluating an individual client to determine the optimal switch location and type. We're going to talk about just what switch assessment is and what things we need to keep in mind when we're assessing a specific client to determine the best switch location and the best switch type to use. Next, we will go through a hierarchy of potential switch sites on the body to help guide decision-making around switch placement. We're then going to dig into location, following a hierarchy to help us determine where to put a switch, and then finally wrap up with switch types, including mechanical and electrical switches.
Before Assessing for Switch Use
Eliminate Other Access Methods
- Direct
- Mouse
- Eye Gaze
- Speech (except for Communication Devices)
- Proportional Driving Methods (for Power Wheelchairs only)
Before initiating the assessment of a client's suitability for switch use, it is imperative to explore and exhaust alternative access methods. While switch access is occasionally perceived as the least efficient means of controlling assistive technologies, this perception often holds true. However, there are instances where switch access represents the sole viable option for an individual or proves to be the most effective method.
It is essential to consider alternative access methods, such as direct selection, mouse access, eye gaze, speech input (excluding communication devices), and proportional driving techniques for power wheelchairs, prior to resorting to switches. Switches operate on a non-proportional control basis. Therefore, it is of utmost importance to systematically eliminate all other potential avenues of access before proceeding with switch evaluation.
Fortunately, in-depth courses covering these diverse access methods are readily accessible within the Continued library, providing comprehensive information and guidance.
Ensure the Client is Well Positioned
- Optimal positioning provides biomechanical advantage and stability for function
- Work with the seating and mobility team
Additionally, it cannot be emphasized enough that the client's positioning is of paramount importance. Ensuring optimal positioning is a critical factor in our assessment process. The positioning of the client must be meticulously addressed to enable them to effectively demonstrate their physical capabilities in accessing switches or controlling their assistive technology. Optimal positioning not only offers stability, which is especially crucial for clients with limited inherent stability, but it also provides a biomechanical advantage for accomplishing functional tasks.
Collaboration with the seating and wheeled mobility team is essential in this regard. In my specific role, I have the privilege of handling both positioning and access assessments, which is highly advantageous given the inherent synergy between the two aspects.
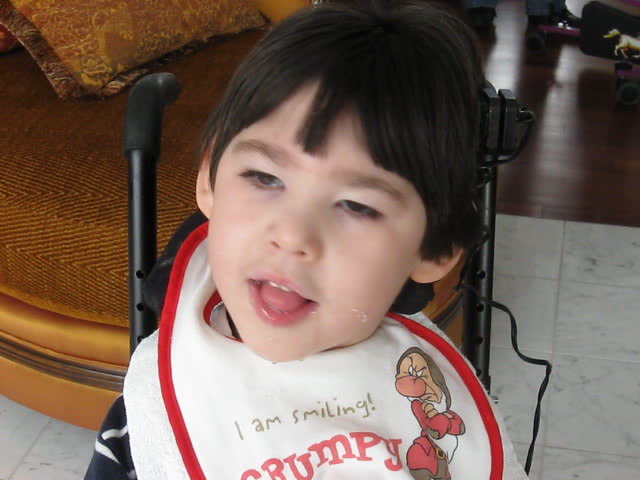
Figure 1 illustrates a case where a young girl is positioned in an adaptive stroller, but her positioning is suboptimal. She has slipped forward and is relying on a strap for both anterior trunk and pelvic support. Furthermore, she is leaning to the side, which prevents her from isolating a specific body part for switch access.
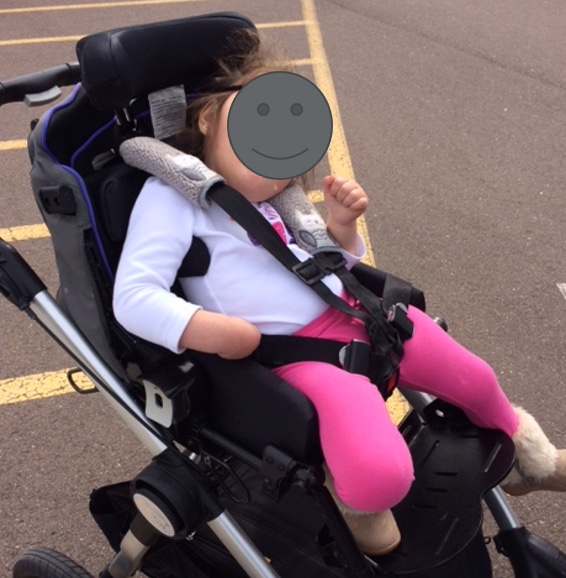
Figure 1. Girl poorly positioned in an adaptive stroller.
In Figure 2, we conducted a thorough evaluation of the young girl's positioning and subsequently recommended a tailored seating system. This specialized seating system significantly improved her overall position and comfort.
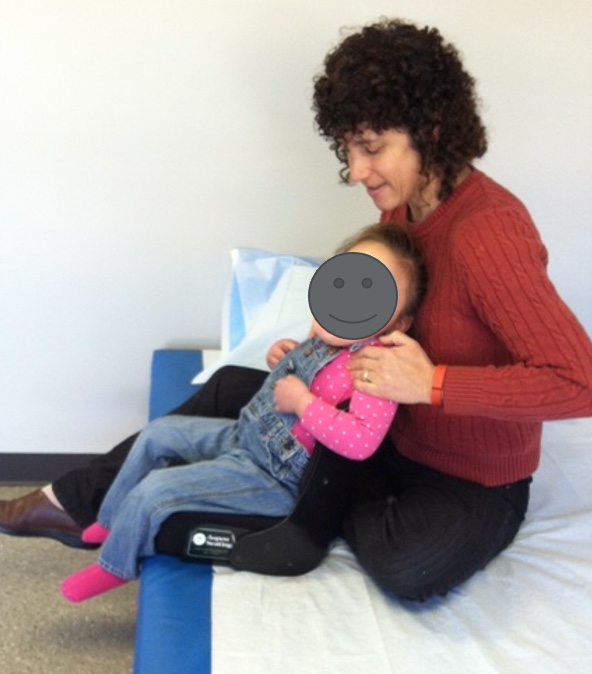
Figure 2. The child is being evaluated on the mat.
What AT Will Be Accessed
- Keep in mind what AT will be accessed
- Switch use varies with the AT accessed
In preparation for the assessment of switch use, it's essential to take into account the specific assistive technology (AT) that will be operated. The effectiveness of switch use can vary significantly based on the nature of the device being controlled.
For instance, when dealing with power wheelchairs and switch-operated toys (toys modified to activate with a switch), the requirement is for sustained contact and pressure on the switch with a quick release. In the context of driving a power wheelchair down a corridor, the user must maintain continuous contact with the switch to propel it forward until they are ready to halt, at which point they release the switch. A similar sustained contact approach applies to switch-operated toys.
However, the scenario changes when we consider scanning, a technique often employed with speech-generating devices and communication aids. In the case of scanning, the client initiates a switch press, patiently waits as options are sequentially scanned, and then activates the switch again when the desired selection is highlighted. This process involves elements of anticipation, patience in waiting, and swift activation. Notably, the timing of the release of the switch is of less significance in this context. It is crucial to acknowledge that these motor skills required for scanning are nearly opposite to those needed for sustained switch use, underscoring the importance of carefully considering switch placement to cater to these distinct requirements.
Access: How
- Switch use varies depending on what you are accessing
- Power wheelchairs and switch toys
- sustained contact/pressure
- quick release
- Power wheelchairs and switch toys
- Scanning
- anticipation and waiting
- quick activation
- timing
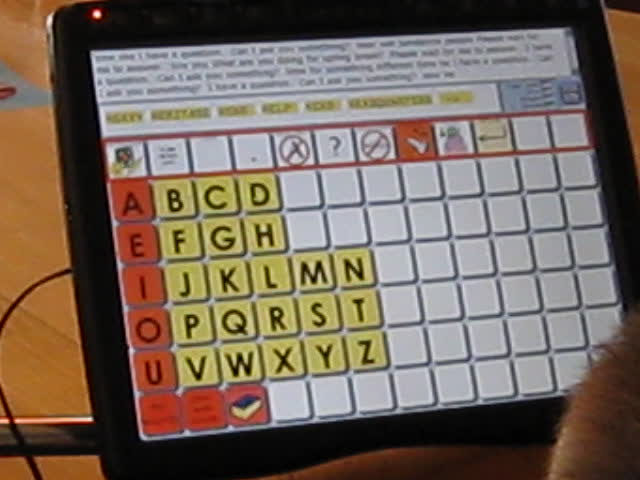
Certain clients may need to utilize the same physical site for multiple functions, such as controlling both a power wheelchair and a communication device, as shown in Figure 3.
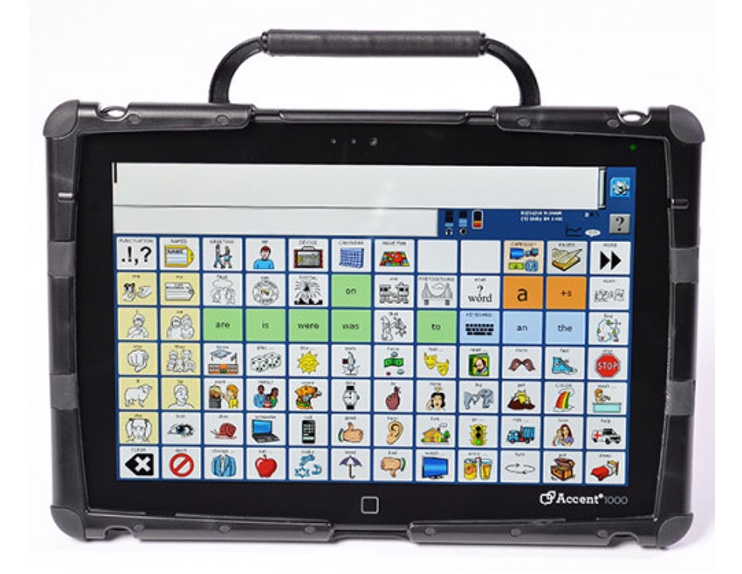
Figure 3. Speech-generating device, PRC Accent.
It becomes essential to assess whether a single site can accommodate the diverse switch demands associated with these functions. For example, a client might employ a switch located on the right side of their head for executing right turns with their power wheelchair while also using that same switch for scanning operations on their communication device. This necessitates the capability to use the identical physical site in two distinct and separate ways, emphasizing the need for versatile switch setups that cater to these unique requirements.
Switch Assessment
Goals
- Goals of Switch Assessment
- Determine an optimal location(s) / site(s)
- This is the most difficult!
- Determine optimal switch type(s)
- Determine an optimal location(s) / site(s)
The primary objectives of a switch assessment revolve around two key aspects: first, identifying the optimal location or switch site on the client's body, and second, selecting the most suitable switch type to align with the individual's specific requirements. It is important to note that pinpointing the ideal switch site can often be the most challenging aspect of the assessment process.
Optimal Access
In the assessment process, prioritizing optimal access should always take precedence over conforming to team expectations or conventional methods. While some team members may advocate for a particular approach based on typical or traditional practices, the client's individual needs and capabilities should guide the decision-making process.
- Optimal access wins over the team’s expectations
- Not using a hand isn’t a failure
- Any switch site has the goal of improving access to
- The communication device for communication
- The power wheelchair for mobility
- The tablet or computer for education and participation
The absence of hand use should not be viewed as a failure; rather, it may signify that an alternative site offers more efficient access. The ultimate objective is to achieve optimal access, not necessarily favoring hand use as a specific criterion.
It's essential to recognize that any chosen switch site should be geared towards enhancing access to communication, mobility, education, and participation. The site and switch themselves are merely tools designed to facilitate the client's occupational goals, not the goals in and of themselves. The primary focus remains on finding the most effective and efficient solution for each client rather than rigidly adhering to a particular switch type or location.
Ideal Switch Site
- An ideal switch site uses:
- small movement
- isolated movement
- volitional movement
- controlled activation
- sustained pressure
- controlled release
Here are some key factors to consider when determining if a switch site is optimal:
- Small movement - The movement required to activate the switch should be a small, discrete motion that the person can repeat consistently. Large, gross motions are more difficult to control precisely.
- Isolated movement - The motion should involve just one muscle or joint, without extraneous movements that could cause unintended switch activations. For example, a finger flick isolated to the index finger is better than a whole hand grasp.
- Volitional movement - The person must be able to purposefully and intentionally perform the movement on their own. It should not be elicited by reflexes or reactions.
- Controlled activation - The person should be able to activate the switch with the same amount of force and precision each time. The movement needs consistent control.
- Sustained pressure - Some switches require the person to hold pressure for a certain length of time, so the selected motion must be able to be sustained.
- Controlled release - Releasing pressure from the switch should also be a controllable, intentional motion.
The ideal switch site will allow the smallest, most isolated, purposeful movement over which the person has good motor control. All candidates should be thoroughly tested with the individual's preferred switch type before final selection. Comfort, efficiency, accuracy, and endurance over time are important factors to assess.
Small Movement.
- A small movement
- Avoiding the “big wind-up”
- Smaller movement increases speed and accuracy in scanning
- Lauren
- Efficiency comparison, hand vs. head
When determining the optimal switch site, it's important to consider that smaller, more isolated movements generally offer greater precision and control. Occupational therapists often draw parallels to the act of writing a check to illustrate this concept. Maintaining bodily stability while using fine finger movements to grip a pen and form letters requires focused effort and results in better legibility. In contrast, large and overly complicated movements involving multiple joints can diminish coordination and impair the precision of actions.
This principle was particularly evident in the case of Lauren, as depicted in Figure 4. Lauren utilized direct access to operate her speech-generating device, emphasizing the significance of fine, controlled movements for effective communication.
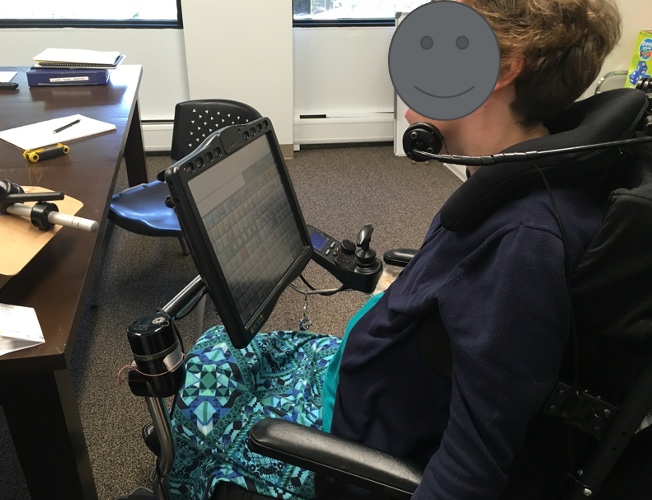
Figure 4. Lauren accessing her speech-generating device.
Reaching out to touch the screen worked adequately in childhood, but the strain increased as she grew. During adolescence, rapid bone growth outpaced muscular adaptation. The large movement pattern to contact the device now caused fatigue and back spasms.
We trialed a jaw switch, allowing a refined, isolated motion. Though new, Lauren's pacing equaled direct access. Critically, the smaller movement reduced spasms and effort. Over time, the jaw switch proved optimal by matching Lauren's evolving movement capacities with the technology's demands.
Careful consideration of multiple factors is needed to identify optimal switch sites. While speed is important, comfort, endurance, and accuracy matter too. Smaller motions permit greater control but may be newly learned. Following clients across changing biomechanics is key. Lauren's case illustrates how isolating movements preserves function when larger patterns fail. Thoughtful selection maximizes precision and sustainability.
Isolated Movement.
- An isolated movement
- Not resulting in overflow
- What is Overflow?
- Travis
- Hip rotation with switch activation
Selecting optimal switch sites requires isolating intentional movements and avoiding extraneous overflow patterns. I once worked with a client named Travis, who exhibited subtle overflow each time he accessed his switch. On observation, Travis consistently rotated his hip slightly forward whenever he triggered the switch. This pelvic motion was unnecessary to activate the switch, indicating overflow recruitment likely related to retained primitive reflexes.
To refine Travis' access, the switch was repositioned to reduce the effort required. This minimized the overflow rotation and allowed Travis to isolate the primary switch activation movement. As with mascara application not requiring mouth opening, optimal switch use should not rely on unintentional movements outside the primary action.
Careful switch placement can focus on volitional motion and motor control. Our role was assessing Travis’ pattern, identifying the inefficient overflow, and fine-tuning the site to eliminate extraneous motions. Targeting isolated, efficient movements maximizes clients’ control and intentionality when accessing switches.
Volitional Movement.
- Not part of a pattern of movement
- Not part of a reflexive movement
- Under voluntary control
We want to ensure that this behavior is not only isolated but also a conscious choice, separate from regular patterns of movement or reflexes. It is important to note that not all movements are voluntary.
I once saw a young boy with a switch placed above his toe area. However, his ability to activate the switch was inconsistent because the movement in his ankle was involuntary (clonus). We needed to find another spot where he had true control and could voluntarily initiate the movement.
Controlled Activation.
- Activation travel
- Activation pressure
- Pressure is generally adequate in clients with high tone, but the release can be difficult
- Speed
- Accuracy
We aim for controlled activation, considering factors such as the travel distance to reach the switch and the pressure needed to activate it (excluding electrical switches, which do not require pressure). For individuals with increased muscle tone, who often rely on switch access, applying pressure may be manageable, but releasing pressure can be challenging. It is crucial to assess these aspects, which we will discuss further in a moment. We want to ensure that the person can reach the switch with sufficient speed and accuracy, particularly when using scanning methods.
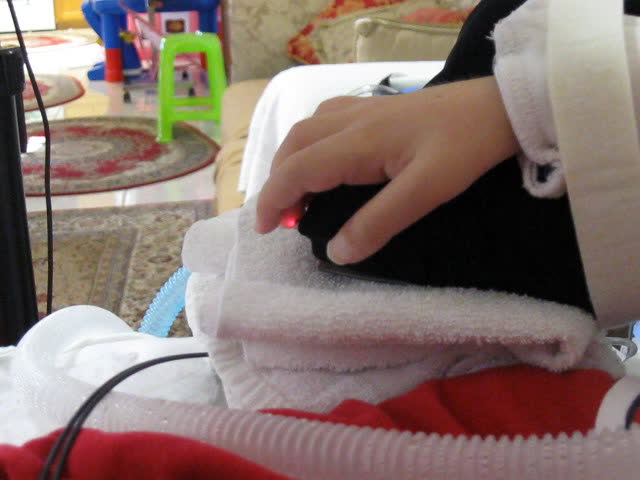
In the example shown in Figure 5, a white switch is positioned near the individual's left cheek.
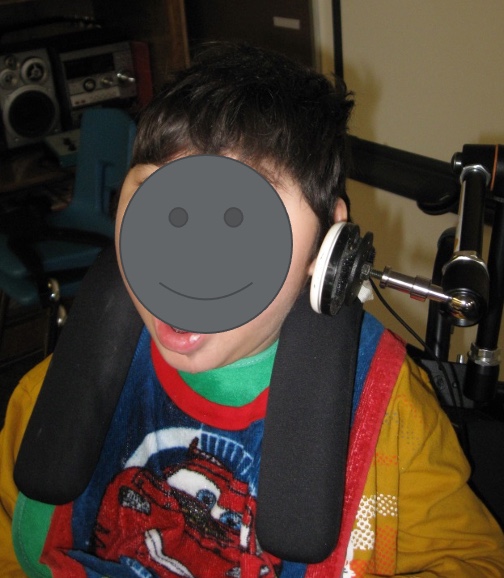
Figure 5. Left cheek switch by this individual.
Sustained Pressure.
- Required in power mobility
- Fatigue issues
- This can lead to overflow, increased tone, patterns of movement
Sustained pressure becomes crucial in power mobility scenarios. Power chairs often have a programming feature called "latch," which allows a single switch press to initiate continuous forward movement until a reverse command is given, causing the wheelchair to stop. However, other directional switches, mainly forward, still require sustained pressure. It is important to note that latch functionality can be challenging in other situations as it may lead to accidents if the user becomes distracted and inadvertently runs into objects.
Fatigue can also cause issues and lead individuals to utilize additional resources within their body, potentially resulting in overflow, increased muscle tone, or the adoption of different movement patterns to reach the switch.
In the image provided in Figure 6, we can observe a head array setup, which incorporates three embedded electrical proximity switches and a mechanical switch represented by the shiny black switch.
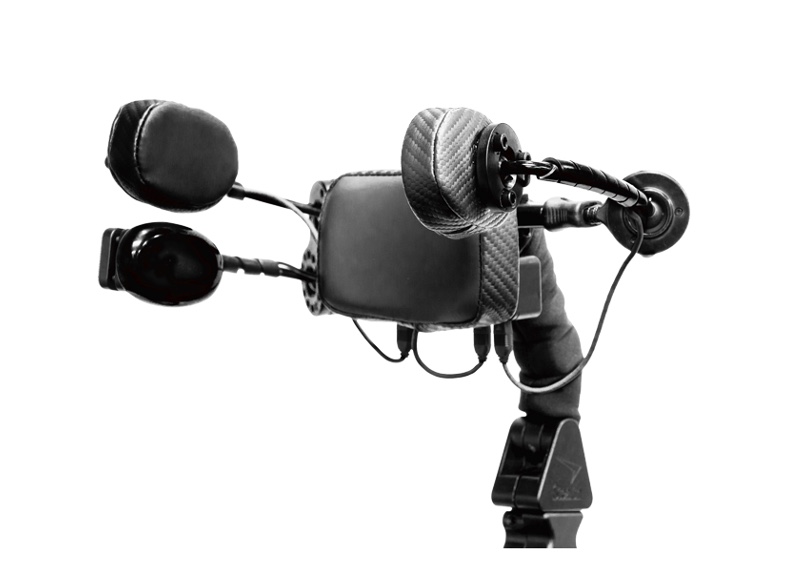
Figure 6. Stealth Products i-Drive Head Array.
Controlled Release.
- Timing (particularly in power mobility)
- Consistency
- Ability to release under stress
- A client may stabilize against a switch.
- Amy
- Getting stuck on the switch behind her head
Selecting optimal switch sites requires ensuring controlled release, especially for power mobility. Though a client may readily release a switch under calm conditions, stress can evoke different reactions.
I worked with a teenager who used a head switch to drive her power chair independently at school. For years this access method worked well until the fire alarm sounded in the crowded hallway. The noise and chaos triggered a startle response - her extensor tone increased, and she became stuck on her forward switch. The chair propelled at full speed down the hall until it collided with the wall, leaving her frightened and the school staff concerned. Though she capably drove with a head switch daily, it did not allow controlled release when alarmed.
In evaluating switches for power mobility, we must consider release under duress to ensure safety. Some clients brace against switches, and others increase extensor tone, preventing intentional let-go. Switch sites must be selected and tested for consistent, sustained access and release, especially if tone fluctuations or tactile defensiveness are present.
Following this incident, we found an alternative switch location that allowed the student to reliably start and stop her chair during calm driving and unexpected alarms alike. Though her original switch site worked under usual conditions, safer mobility required controlled access release in all circumstances. By proactively identifying factors that could impede release, we can select optimal sites for clients to participate fully, confidently, and responsibly.
Switch Training
- Many clients will benefit from training to optimize switch skills, including:
- Timing and Accuracy
- Anticipation
- Release
- Training will vary with the specific switch application.
Switch training is extremely important after optimal sites and selections are made. Clients benefit from practice to build automaticity, timing, accuracy, and anticipation with their switches, tailored to the specific technology being operated.
For instance, general training may improve isolated access and release, while scanning practice can enhance timing, prediction, and efficiency. The goal is for switch use to become an automatic motor pattern so cognitive focus stays on driving direction or message content - not physical access itself.
This fluency takes extensive repetition over time to develop, like learning to brake a car reflexively when a hazard appears. With practice, switch activation becomes instinctual versus a conscious, effortful movement each time. Training plans should consider positioning, fatigue, tone fluctuations, and other factors unique to each client.
Switch skills will evolve as clients gain experience across diverse contexts and technology uses. Continued coaching and technology adjustments can help resolve any access barriers that emerge. Identifying optimal sites is only the first step. Thoughtful training builds automaticity so clients can participate and communicate as seamlessly as possible. Consistent switch practice develops the automatic motor patterns essential for efficient access.
Assessment Considerations: High Tone
How Does Increased Muscle Tone Impact Access?
- Motor control is decreased.
- Volitional control is decreased.
- Extraneous movement may be present.
- Primitive reflexes or patterns of movement may influence motor control.
- Movements may be larger.
- Movements may have more force.
- Movement disorders (dystonia, athetosis): tone and function may fluctuate
Selecting optimal switch sites for clients with increased muscle tone requires in-depth analysis due to impacts on volition, control, and stability. Motor control and intentional movement are decreased overall with high tone. Extraneous motions driven by tone or retained primitive reflexes may emerge, reducing isolation.
Stability is typically compromised as well. Forceful, large pattern movements are common. Most challenging are clients with fluctuating tone from conditions like dystonia or athetosis, where function varies day-to-day. For these clients, switch sites must be carefully vetted across multiple sessions to determine options flexible enough to accommodate variability yet focused enough to provide consistent access. What works one day may be ineffective the next as tone, and involuntary motions shift. Providing adaptable solutions and alternatives is essential to maintain function through fluctuations. Precisely tuning sites to isolate intentional yet adaptive movements despite ongoing tone changes takes extensive trial and error and creativity. However, diligent detection can identify effective switch-control strategies even in the presence of significant motor challenges.
What Diagnoses Are Characterized By Increased Muscle Tone?
- Cerebral palsy
- Traumatic brain injury (TBI)
- Some metabolic and genetic conditions
When working with clients with increased muscle tone with diagnoses listed above, occupational therapists must carefully analyze movement to identify optimal switch sites.
Best Site
- Determine where the client has the smallest, volitional, and isolated movement
- Determine the force behind the movement
- Determine if the movement is consistent
For example, a client with cerebral palsy with high flexor tone in his arms pulled them forward involuntarily. Mounting a switch in front caused him to get stuck and unable to release. Observation revealed he could produce a small, controlled rearward arm motion against the pull of his tone. We mounted a switch behind his arm, aligning activation with this intentional movement. This allowed him to access the switch and consistently release it even as his tone fluctuated. By selectively using his most subtle controllable motion and avoiding the direction of his extensor tone, he could reliably operate his communication device.
For clients with high tone, finding movements that work with or around inherent forces is key. Though increased tone presents challenges, thoughtful alignment of sites with clients’ mechanics can enable optimal switch access.
Fatigue
- Determine if the movement fatigues, resulting in overflow and increased tone, patterns of movement
- Can the movement be used:
- Repeatedly (i.e., scanning)
- With sustained force (i.e., PWC)
When selecting optimal switch sites for clients with high muscle tone, it's important to determine if the movement fatigues the client, which can lead to overflow, increased tone, and patterns of movement. We want to make sure that the movement to activate the switch can be used repeatedly, such as when someone is scanning on a communication device and can hit the switch hundreds of times a day. We want to ensure the movement is still under the person's control and not result in excessive fatigue. We also need to assess if the movement can be used with sustained force, such as required for a power wheelchair mechanical switch.
Let's Get Practical
- Think of a client you are working with
- As we move through the course, think of where you may try to place a switch and what type of switch you would use for access to assistive technology.
As we move through this course, think of your clients and where you may try to place a switch, and what type of switch you would use to access their particular assistive technology. Perhaps, they are not even able to use their assistive technology yet, so it might first start with their position. Make sure you jot down some notes and try it out after this course.
Switch Site Hierarchy
- Hands
- Head
- Mouth
- Feet
- Lower Extremities
- Upper Extremities
When considering switch site selection, occupational therapists utilize a general hierarchy starting with hands and progressing through the head, mouth, feet, and extremities. However, astute observation and assessment should determine if jumping into the hierarchy at a specific point makes the most sense for an individual client. Rather than following the levels rigidly, the therapist watches closely during evaluation for where intentional movement and greater control are present. This allows them to identify optimal sites beyond the typical sequence. While the hierarchy provides a helpful framework, it should not limit clinical reasoning. Skilled observation may reveal it is best to zero in on a productive switch site rather than initiate a linear approach. Starting where motor control is evident, versus adhering to rote progression, can lead to better access solutions for a client. The hierarchy guides but does not replace responsive clinical decision-making.
Switch Site Hierarchy- Hands (1)
Hand Options
- Horizontal placement
- Vertical placement
- Under tray placement
- Finger movement
- Pincer
- Grasp
When clients demonstrate hand control that could allow switch access, occupational therapists should consider horizontal positioning on a tray or table, often in the midline, for bilateral access. However, lateral placement may suit clients with difficulty crossing the midline.
Vertical switch alignment, positioning under trays, or configurations precisely capturing finger or pinch movements are other options requiring close observation of subtle hand skills.
During an evaluation with a two-year-old with arthrogryposis, the therapist tested three temporary hand switch placements to analyze the precision activating each. This informed the design of a customized swing-away tray optimized for the child's skills. Careful detection of a client's unique hand abilities should guide not only optimal switch position but mounting and interface design solutions as well. Keen assessment can reveal effective switch sites leveraging clients’ available hand control.
Video #1: Horizontal Placement
- Here, this young child with arthrogryposis accesses 3 switches using her right hand to drive an evaluation power wheelchair
- Temporary placement on a piece of foam
- Eventually will need a small swing-away tray
We carefully analyzed the client's limited hand strength and range of motion to determine optimal switch positions and sensitive types matching her skills. Multiple alignments and switches were tested during the evaluation to identify solutions suiting the client's subtle control. Her subsequent success controlling her power wheelchair demonstrated how meticulous assessment and site/switch tuning provided customized access fitting her needs. Thorough evaluation and clinical reasoning helped match the switch interface to the client's distinct motor capacities.
Vertical Placement
- Eliminates a plane of movement
- Must be secured
Vertical switch alignment is another option for hand access, using products like the angle-adjustable switch or custom hardware configurations. Vertically orienting a switch on the edge of a tray eliminates one plane of movement. With a horizontal switch, the hand must lift up, move across the surface, then push down to activate. A vertical alignment allows lateral motion straight to the switch without the added vertical lift. This more direct path can benefit clients with a limited range of motion or motor control, reducing the complexity of the required hand movement. Thoughtful placement takes advantage of such nuances in motor patterns. Orientation is a key factor, along with position, in sculpting an optimal interface aligned with a client's skills.
Under Tray
- Eliminates a plane of movement
- Need cue above the tray
- Loop Velcro
- We will talk about proximity switches more under Switch Types
Mounting switches under trays is another clever way to eliminate a plane of movement for hand access. As you described, proximity switches placed under the tray allow activation by passing the hand above without the added motion of pushing down. Tactile cues like Velcro can mark the activation zone since vision is directed at driving. This tray integration reduces hand effort while enabling precise control.
The fiber optic switches circled for the two clients with SMA showcase accessing an under-tray switch with slight thumb and finger movements (Figure 7).
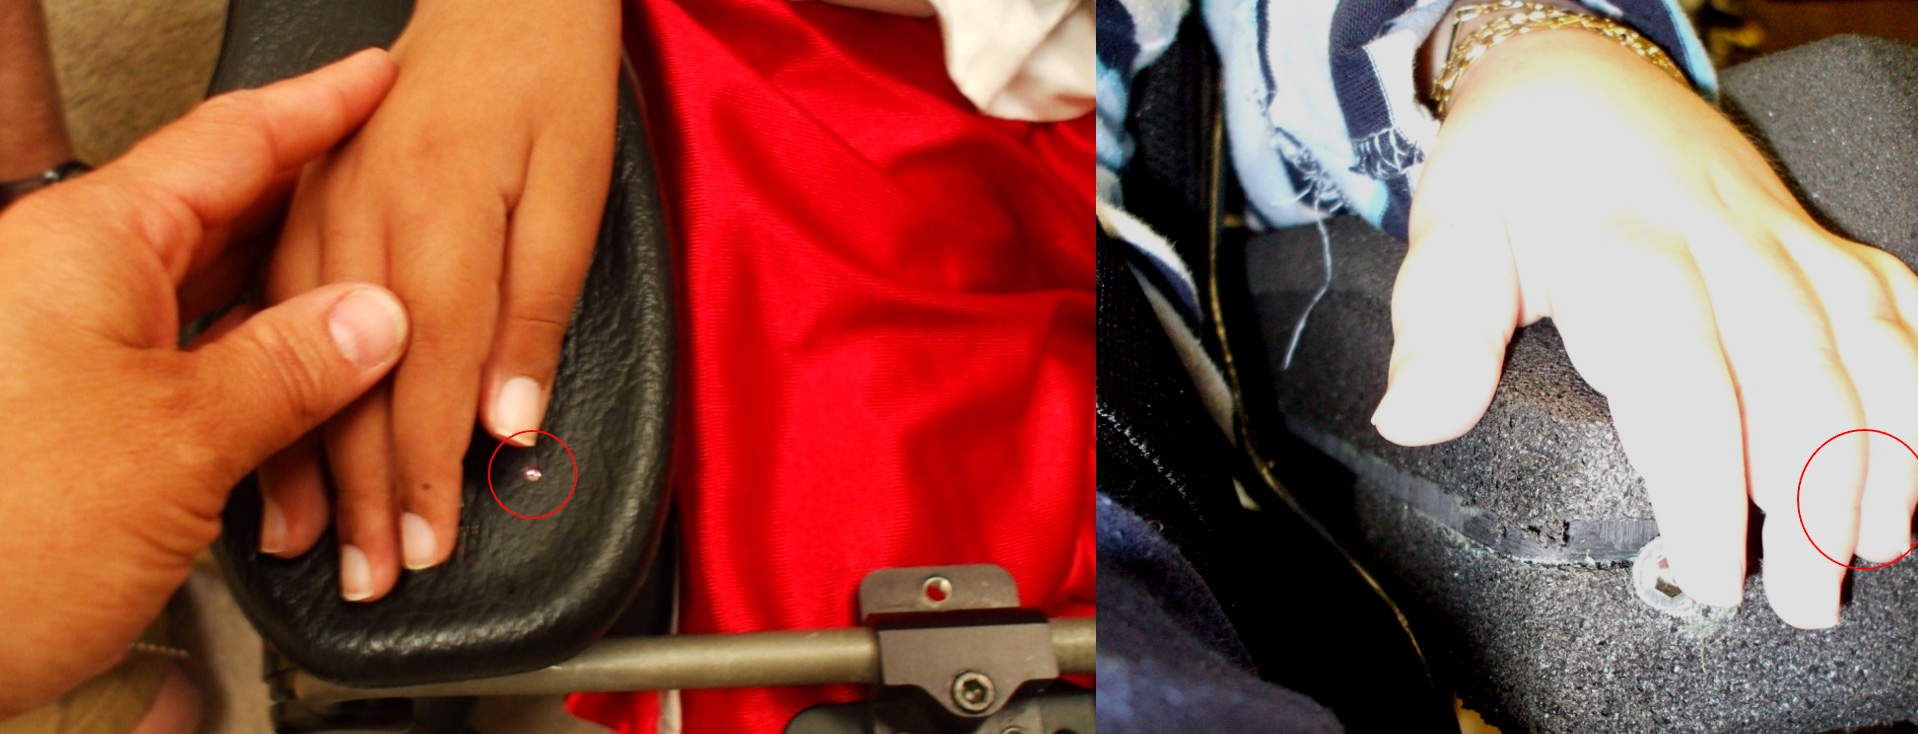
Figure 7. Adaptive Switch Labs fiberoptic switches.
Embedding a small fiber optic terminus in the arm trough captures their subtle volitional motions to activate an electronic switch requiring no force. This exemplifies crafting a customized interface to leverage minimal movements. The fiber optic switch and precise placement allowed focused, effective control despite significant weakness. An example is shown in Figure 8.
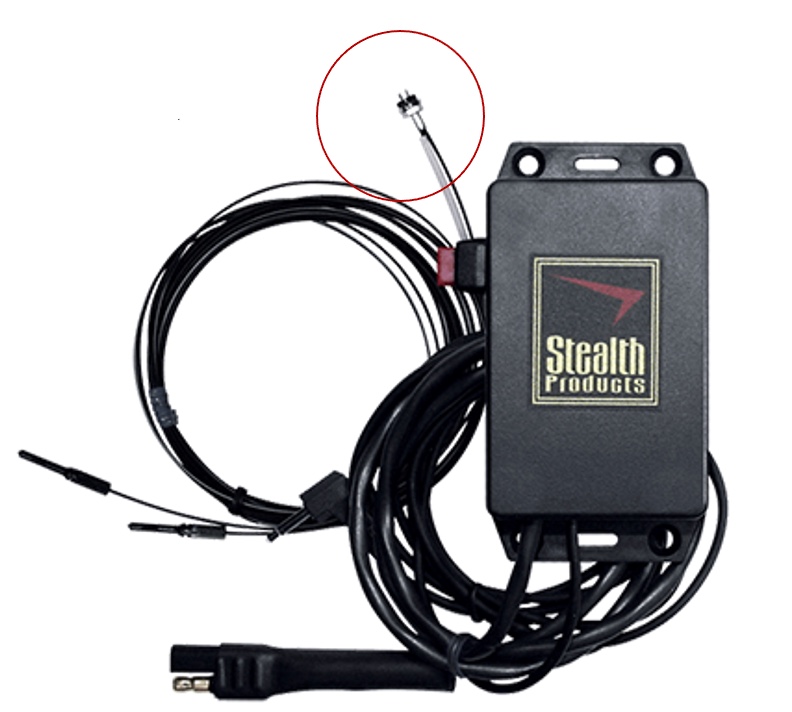
Figure 8. Stealth Products fiberoptic switch.
Mounting solutions demonstrate a keen awareness of managing planes of motion and honing in on residual volition. It is important to find ways to expand clients’ access through strategic placement and orientation.
Finger Movement Video #2 and Images
Let's go ahead and watch this young man activating his switch, which has been mounted in a custom mount within his hospital bed.
Another example of finger movement to operate a switch is shown in Figure 9.
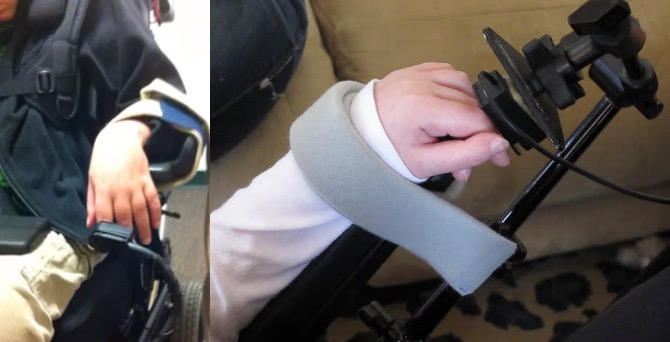
Figure 9. Finger movement to access a switch.
Wrist Extension
- Custom mount to accommodate wrist flexion contractures by Aspen Seating
- Extends wrist to activate
This adult, in Figure 10, had lost a significant amount of wrist extension and spent most of his time with his wrist flexed.

Figure 10. A client accessing a switch with wrist extension.
His mom was concerned, understandably. Custom supports were made for both arms and placed on his tray to extend his wrists and support his arms, which were collapsing inward. The supports were created by Aspen Seating Ride Designs in the Denver area. Once using them, we noticed he could extend one wrist slightly. The wrist was not the primary switch site that he used to control his communication device, but since he could extend this wrist, we thought it could be useful for other tasks. This young man volunteered at the local library, stamping books with an electric stamping system by pushing a switch. Though less common now, this allowed him to participate in a meaningful way.
Pincer
- Caution, the client may drop the switch
- Alternative option:
- AbleNet Specs switch on strap base
Pinching movements between the thumb and forefinger can also be used to activate switches. However, clients may drop a handheld switch. A good option is AbleNet's Specs switch, which is small and sensitive. It comes with strap bases to wrap around the hand, allowing clients to grasp to activate without dropping.
Figure 11 shows an Enabling Device on the left and a client using a switch strapped to her hand, enabling her to use a pinching movement reliably on the right.
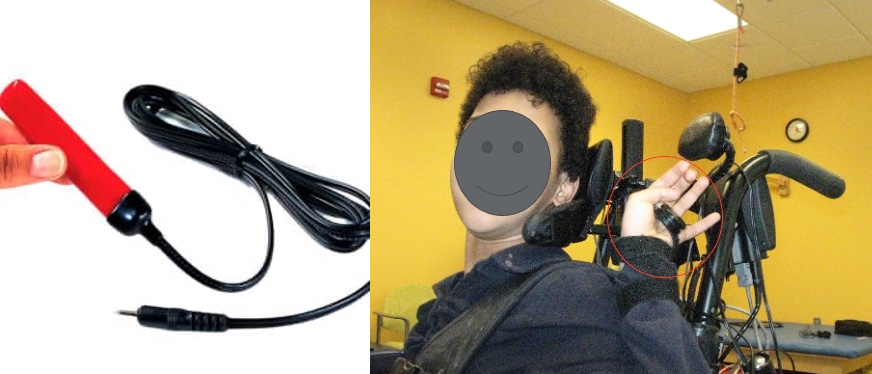
Figure 11. Pinch Switch Enabling Devices.
Enabling Devices also make a pinch switch that can be activated by pinching anywhere.
Grasp
- Caution, the client may drop the switch or have difficulty releasing
- Alternative – AbleNet Spec switch on strap base
Pinching or grasping switches can be activated by movements between the thumb and forefinger or by grasping within the hand. An example can be seen in Figure 12.
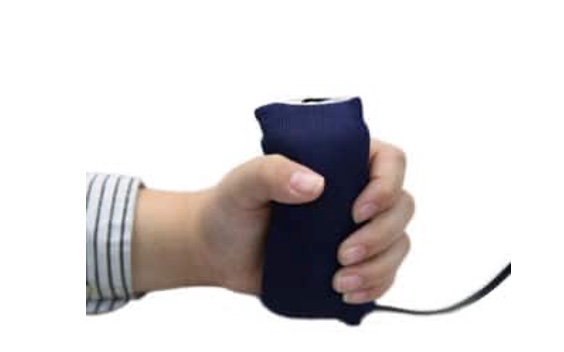
Figure 12. Cushion grip switch by Enabling Devices.
However, clients may accidentally drop a handheld switch when releasing. This is especially true for clients with increased tone who stabilize by squeezing the switch.
AbleNet's Specs can be strapped to the client's hand. This allows reliable activation through pinching or grasping movements without worry about dropping upon release. The straps are useful for clients who may have difficulty fully releasing their grasp on a handheld switch.
Question Time: How To Connect the Switch During Assessment?
- Fun, motivating
- Little chance of an error
- Break down the task
A common question is what to connect the switch to during the evaluation of potential sites. For some clients, just placing a switch and asking them to activate is enough. But often, something more motivating and engaging is needed, especially if the task is not very meaningful yet. Connecting the switch to something fun, with little chance of error, works well. Examples are switch-controlled tablet apps - when the switch is hit, something exciting happens, like music or characters dancing. The same concept works for adults, such as turning music on and off. The goal is to break down the task so we can accurately assess while keeping the person motivated with an enjoyable activity when they activate the switch.
An Example
- Toni
- 6 years old, cerebral palsy
- Assessment
- Switch held by the right side of his head
- Poor positioning
- Facing a computer with a very small scan on the bottom of the screen
- Software: math program
When I first met Toni, a 6-year-old with cerebral palsy, I observed him in a session with his speech therapist. She was holding a switch next to the right side of Toni's head while he faced a computer screen. Toni had rather poor positioning in his chair. The switch controlled a math software program on the computer, which had a small on-screen scan.
This scenario presented multiple components to evaluate all at once - math skills, scanning, access method, positioning, and more. To accurately assess Toni's abilities, it is important to break down the task and evaluate each piece individually at first, as simultaneously is too complex. This example highlights the importance during the initial evaluation of keeping the task simple and focused in order to determine Toni's true capabilities one step at a time.
- What’s wrong with this picture?
- Switch held by the right side of his head
- Not secured, so placement was inconsistent
- Switch held by the right side of his head
- Poor positioning
- He lacked stability and alignment for function
- Facing a computer with a very small scan on the bottom of the screen
- Visual abilities were not yet tested
- We didn’t know if he could read
- Software: math program
- We didn’t know if he understood math!
In the initial scenario, the major issue was that there were too many components being evaluated at once, making it impossible to pinpoint Toni's true capabilities and challenges. The switch was inconsistently held by his head rather than secured in place, reducing our ability to properly assess placement.
Toni's positioning was poor, impacting his stability and alignment for switch access.
He also faced a computer screen with a small scan, but his vision was untested. The scan contained letters and numbers, yet his literacy was unknown.
The switch controlled math software, but math comprehension had not been evaluated.
With switch type, placement, vision, positioning, literacy, and math skills all under examination simultaneously, it was understandably difficult to discern why Toni struggled. This example demonstrates the importance during the initial evaluation of breaking the task down into individual components and evaluating one piece at a time. This allows for determining Toni's capabilities and support needs in each specific area.
- Solution
- Positioning evaluation and new seating system
- Switch secured in a potential location
- Switch attached to a simple switch toy that he enjoyed
- Break down the task
- Know what you are evaluating
To better evaluate Toni's abilities, we broke down the task into individual parts. We addressed positioning first with a new seating system. We secured the switch at potential locations and connected a motivating switch toy. This allowed for systematically evaluating different sites and switches to determine the optimal set-up for Toni. By evaluating one component at a time rather than multiple skills simultaneously, we could accurately pinpoint Toni's capabilities and support needs.
Switch Site Hierarchy- Head (2)
Head Options
- Rotational vs. lateral flexion
- Cheeks
- Rooting reflex
- Temple
- Glasses
- Eye injuries
- Side of head
When evaluating potential switch sites, it is important to consider the various options around the head. The most common placement is along the side of the head, which the client can access using lateral flexion or rotation. One example is shown in Figure 13.
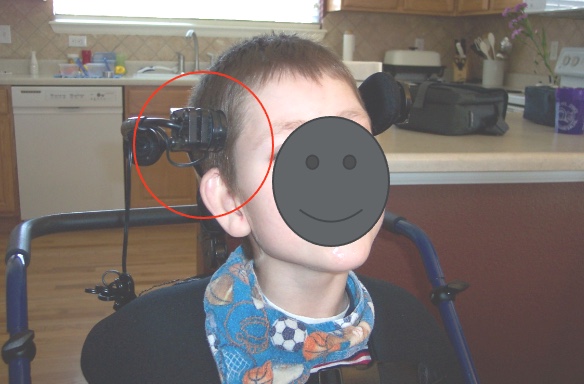
Figure 13. Example of a lateral head switch.
Other potential spots include the cheek, temple area, or generally anywhere along the side of the head.
One consideration with the temple area is that clients who wear glasses or turn their heads may end up with the small switch making contact with or poking their eye, so caution should be used.
Having an awareness of the multiple switch access points around the head will allow a thorough exploration of options when determining the optimal site for an individual client.
Video #3: Using a Head Switch
The video shows Brady, a client who is using a switch mounted by the right side of his head above his ear. He is using this head switch to access his communication device. In the video, Jill Tolman, a speech-language pathologist, who has collaborated with me for many years, is working with Brady. Brady's mom also makes a brief appearance in the video. This provides an example of a potential switch site near the side of the head, specifically one placement option being above the ear.
Examples of Head Switches
Here are several examples of clients using switches positioned near the side of their heads. One photo depicts a client accessing a rather large Jelly Bean switch by his left cheek, which provided the degree of feedback he needed at that time. Another example shows a Jelly Bean switch temporarily mounted during an evaluation of the left cheekbone area. Additionally, a young man is shown using a smaller Specs switch above his ear that is occluded by a permanent mount on his headrest.
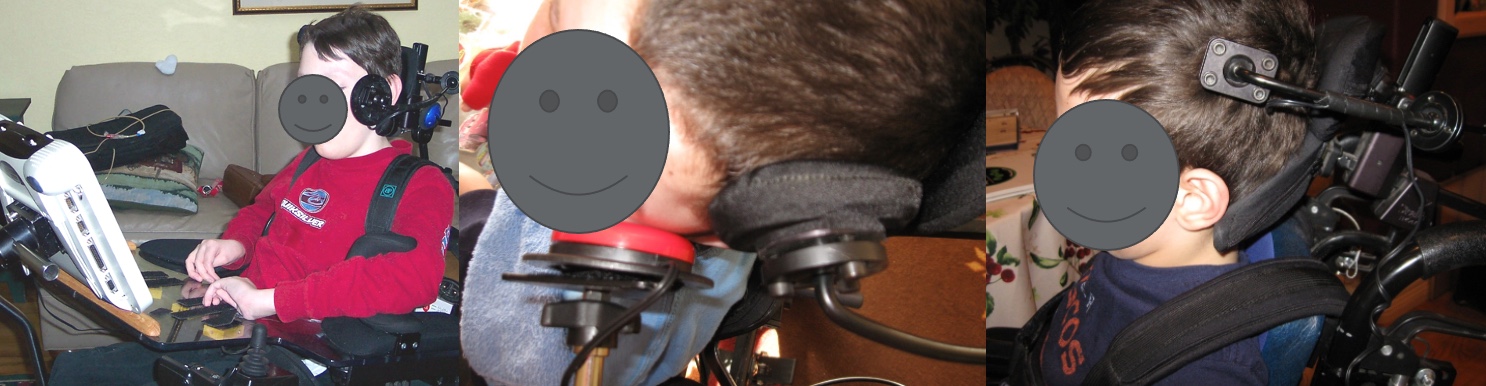
Figure 14. Examples of switches mounted by the head.
These examples demonstrate different switch options and placements that can be successful around the head region, particularly the side of the head, for clients with a variety of needs.
Video #4: Head Switch Use
Let's take a look at how he's using his switch.
He's telling us that he's five, his name, and all about his siblings. When mounting to the side of the head, it's important to come up with some type of permanent mounting system for all these switch sites.
Side of Head: Mounting Idea
- Stealth head support
- Replace the lateral pad with a switch
One of my favorite things to do is to use a Stealth head support. They have quite a lot of different head supports. One type here you can see has pads that go by the side of the head. You can replace the pad with a switch, and they have a mounting plate for some very specific switches, including the Microlight, the Egg switch, which we'll look at a little bit, and an AbleNet Spec switch. This allows the switch to be very precisely placed by the side of the head and swing out of the way if it's not being used. In Figure 15, we have a young man that I work with who needed a little more stability by the side of his head.
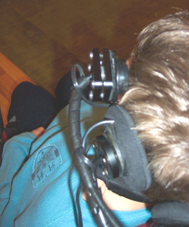
Figure 15. Switch mounted to the left side of the head of a client.
Sometimes he had a little trouble finding the switch or bounced off of it. We put a pad and then a separate mount for the switch in front of that. It allowed him to stabilize against the pad and pivot off of it to hit the switch. Anything we can do to help someone be more efficient in their switch access is always a good thing.
Chin
- Under chin
- Side of chin
- Can use jaw or head movement
We can also place a switch by the chin, either under the chin or by the side of the chin, and either of these locations can utilize jaw or head movement. This young lady is using a Microlight switch, which is a very light touch mechanical switch underneath her chin (Figure 16).
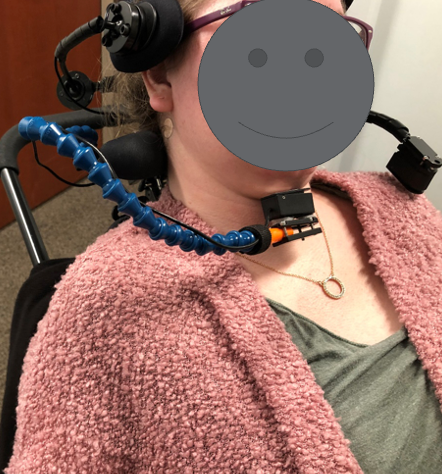
Figure 16. Client with a LocLine and Microlight switch under her chin.
She's also using a second switch in front of her shoulder, but we'll talk about that in a little bit. In Figure 17, we see a special headset mount from Adaptive Switch Labs.
Figure 17. Adaptive Switch Labs headset mount.
This allows us to mount several types of switches. In this picture, they're using this for a fiber optic switch or sensor for less used sites around the head, including behind the head, the forehead, the eyebrow, and eye blink.
Less Used Sites
- Behind head
- Forehead
- Eyebrow
- Eye blink
There are less-used sites. For example, behind-the-head switches can be problematic for some clients as they can become stuck on the switch during extension. However, this area is a common site in power mobility because many people drive with something called a head array with a switch behind the head. The forehead is not commonly used because it's hard to place a switch without obscuring vision, and the client has to drop their head down to access the switch. It can also be hard to release the switch. An eyebrow and eye blink can also be used, and we will discuss some very specific switches used to capture that movement. These are fussy switches that often require a lot of calibration, and that's why these are further down our hierarchy. Figure 18 shows an example of an eye blink switch.
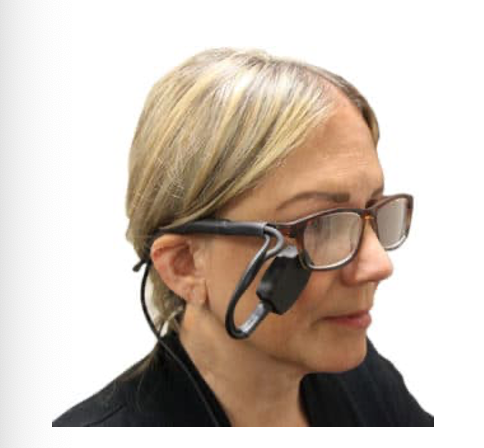
Figure 18. Eye Blink Switch from Enabling Devices.
Switch Site Hierarchy- Mouth (3)
Sip 'n Puff
- Requires intra-oral pressure/control
- Lip closure – difficult for people with increased tone
- Competent soft palate – lost in ALS
Further down our hierarchy is the mouth. Usually, if we're looking at the mouth, we are looking at a sip and/or puff switch (Figure 19).
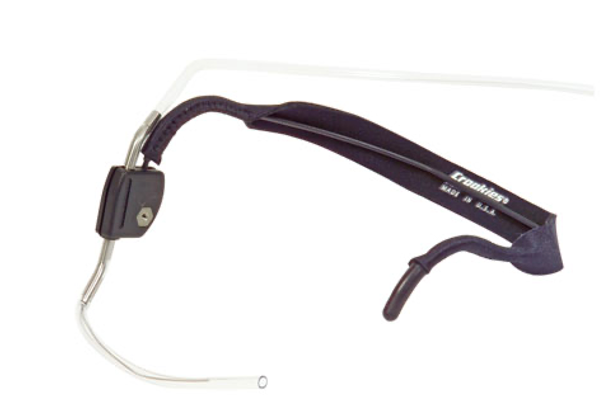
Figure 19. Adaptive Switch Labs sip n puff for ear mount/
Sip 'n Puff is most commonly used for power mobility, but it is possible to use a standalone sip or puff switch or both for control of other assistive technology devices or for practice. Using a sip or puff switch requires control of the pressure within the mouth. It is not breathing in and breathing out, even though it sounds like it. Many on ventilators use a Sip 'n Puff type of switch, so they are not relying on breath control but rather pressure within the mouth. To regulate that pressure, the client has to have good lip closure to keep the air from escaping through the lips. That can be difficult for a lot of people, particularly people with increased tone. They also have something called a competent soft palate; otherwise, air escapes out the nose. This is why people with ALS are unable to use Sip 'n Puff or not for very long because the competency of the soft palate is lost.
Tongue
- Protrusion against cheek
- Protrusion forward - Vincent
Further down the hierarchy, it is also possible to capture movement at the tongue. It's a little hard to see in Figure 20, but this young man turns his head to hit his switch and pushes his tongue against the inside of his cheek.
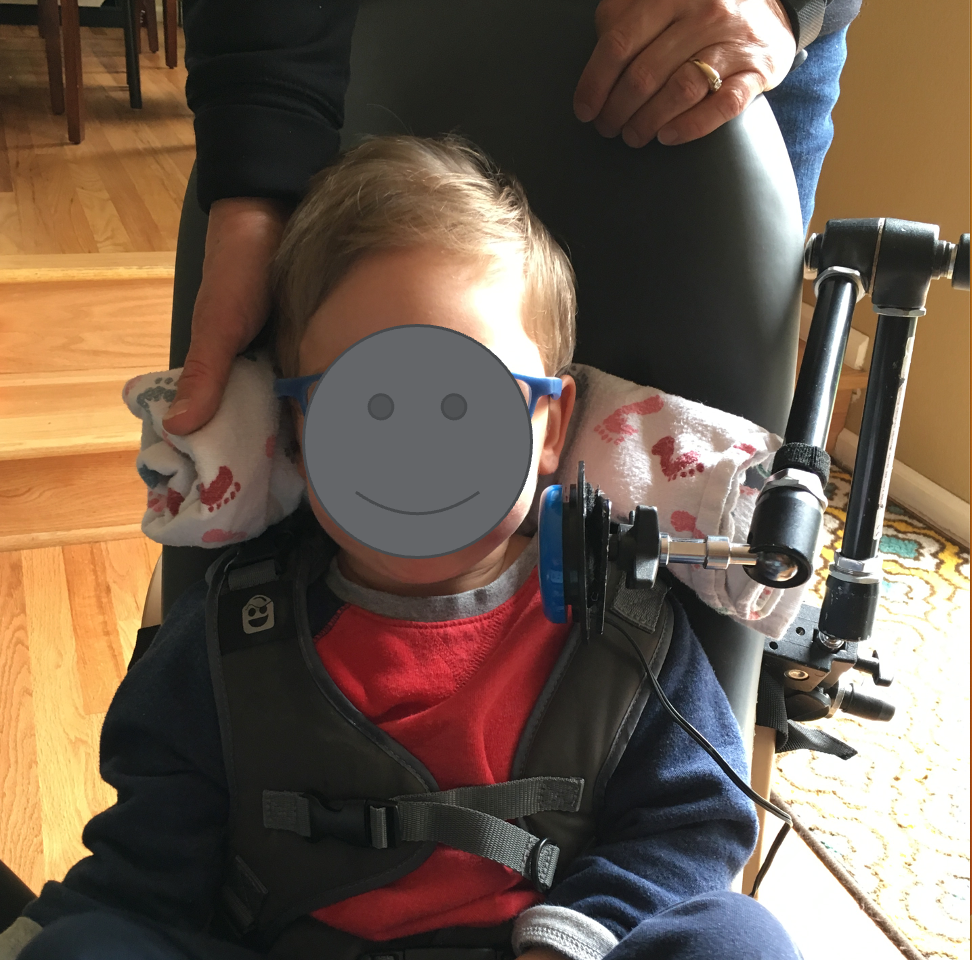
Figure 20. A child uses his cheek/tongue to hit an AbleNet Jelly Bean switch.
It's also possible to capture protrusion forward, but this can be difficult for many reasons. Mounting is not easy, and we have to accommodate for secretions. It's important that we use a switch that is sealed and not broken. We live in a culture where sticking our tongue out at people is not socially cool, so we don't want to use forward tongue protrusion unless we need to. I did use this with a young man named Vincent, who was in long-term care. He was the victim of a gunshot wound and was not expected to survive. He had very little rehab and lost all of his available range and volitional control except the movement of his tongue. We used a specialized switch to capture that.
Question Time
- My client can access switches in several areas. How do I pick which is best?
- Go back to the ideal switch site list
- Pick the one (if you only need one) that best fits the criteria
It's always good to go back to our list of what an ideal switch site is and then pick the one that best fits the criteria if you only need one. And if you need more than one, now you have more than one option.
Switch Site Hierarchy- Feet (4)
Feet Options
- Above foot (dorsiflexion)
- Below foot (plantar flexion)
- Sides of foot
Continuing with our hierarchy, we are moving on to the feet. It's possible to put a switch above the foot using dorsiflexion, below the foot using plantarflexion, or by either side of the foot. Figure 21 shows a little boy who uses switches under his feet for left and right directional control of his power wheelchair. He's really good at it.
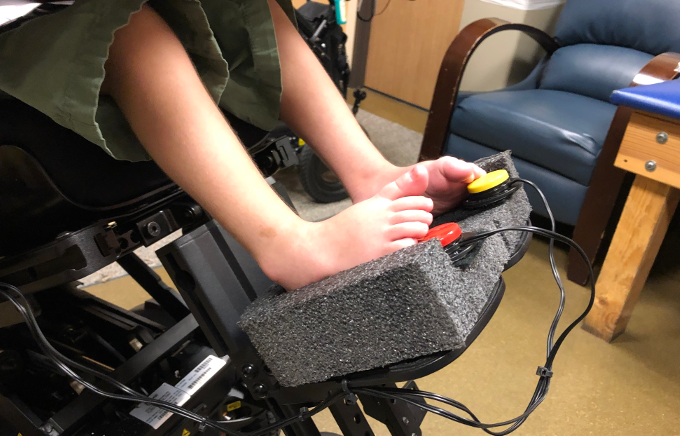
Figure 21. The client uses controls by his feet to change the direction of a power wheelchair.
The young lady in Figure 22 reaches out with a switch and activates it with her foot while she's in her chair.
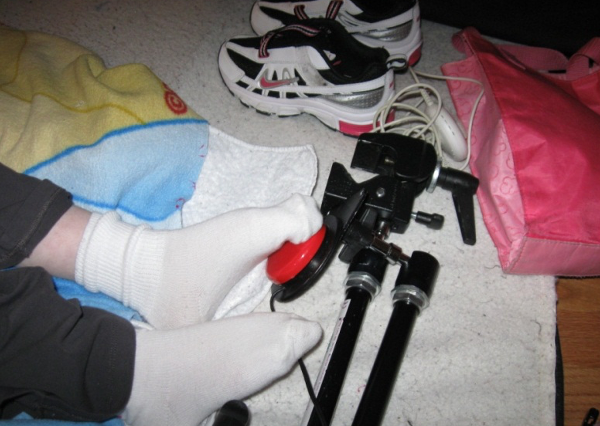
Figure 22. Another example of a client operating a power wheelchair with a right controller by her left foot.
When she's at home and resting, she's still able to use a switch in this location. We simply attached it to a universal switch mount that weighs enough that it holds the switch where we need it and at the angle that's required. She uses this to control her communication device. She does move her hands, but not in a functional way. She has a similar condition to Rett's Syndrome, where young girls appear to have more control over their hands than they actually do.
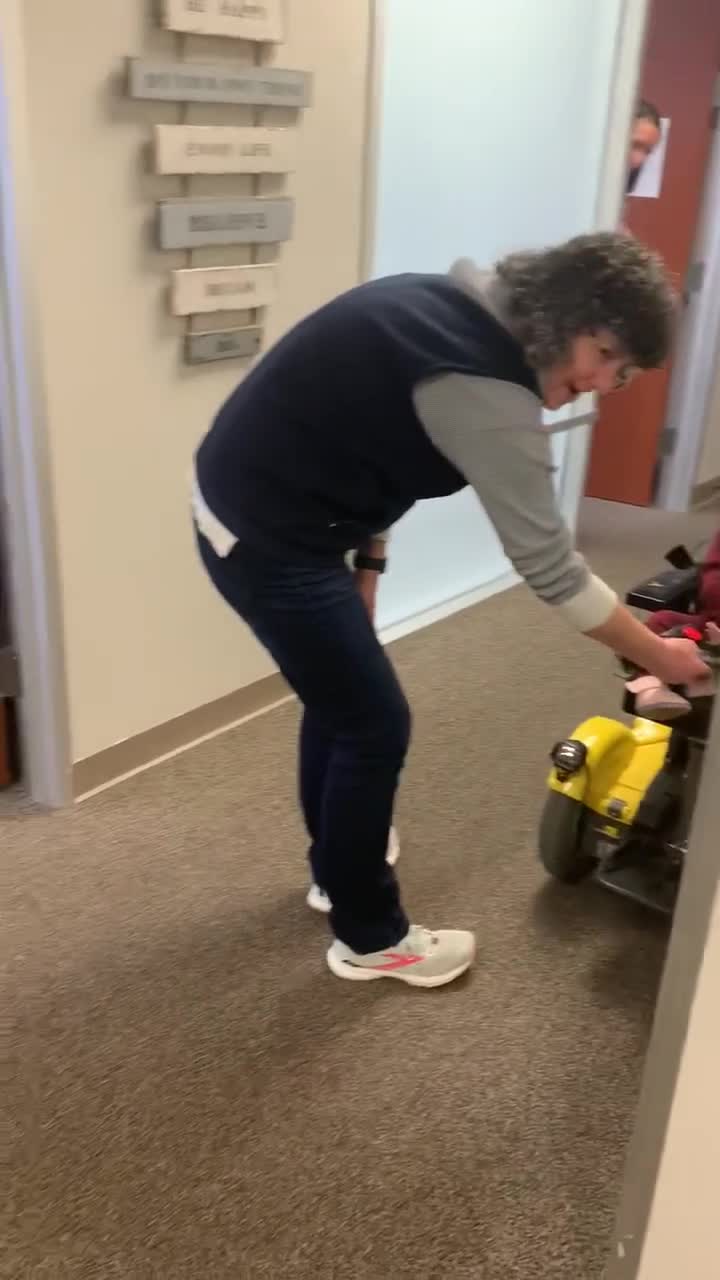
Video #5: Foot Placement
- Gabriel
- 1 switch at left hand
- 2 switches under each foot
- Custom-made foam foot blocks
- AbleNet Specs switches
Here's that same young man using his two feet in this video.
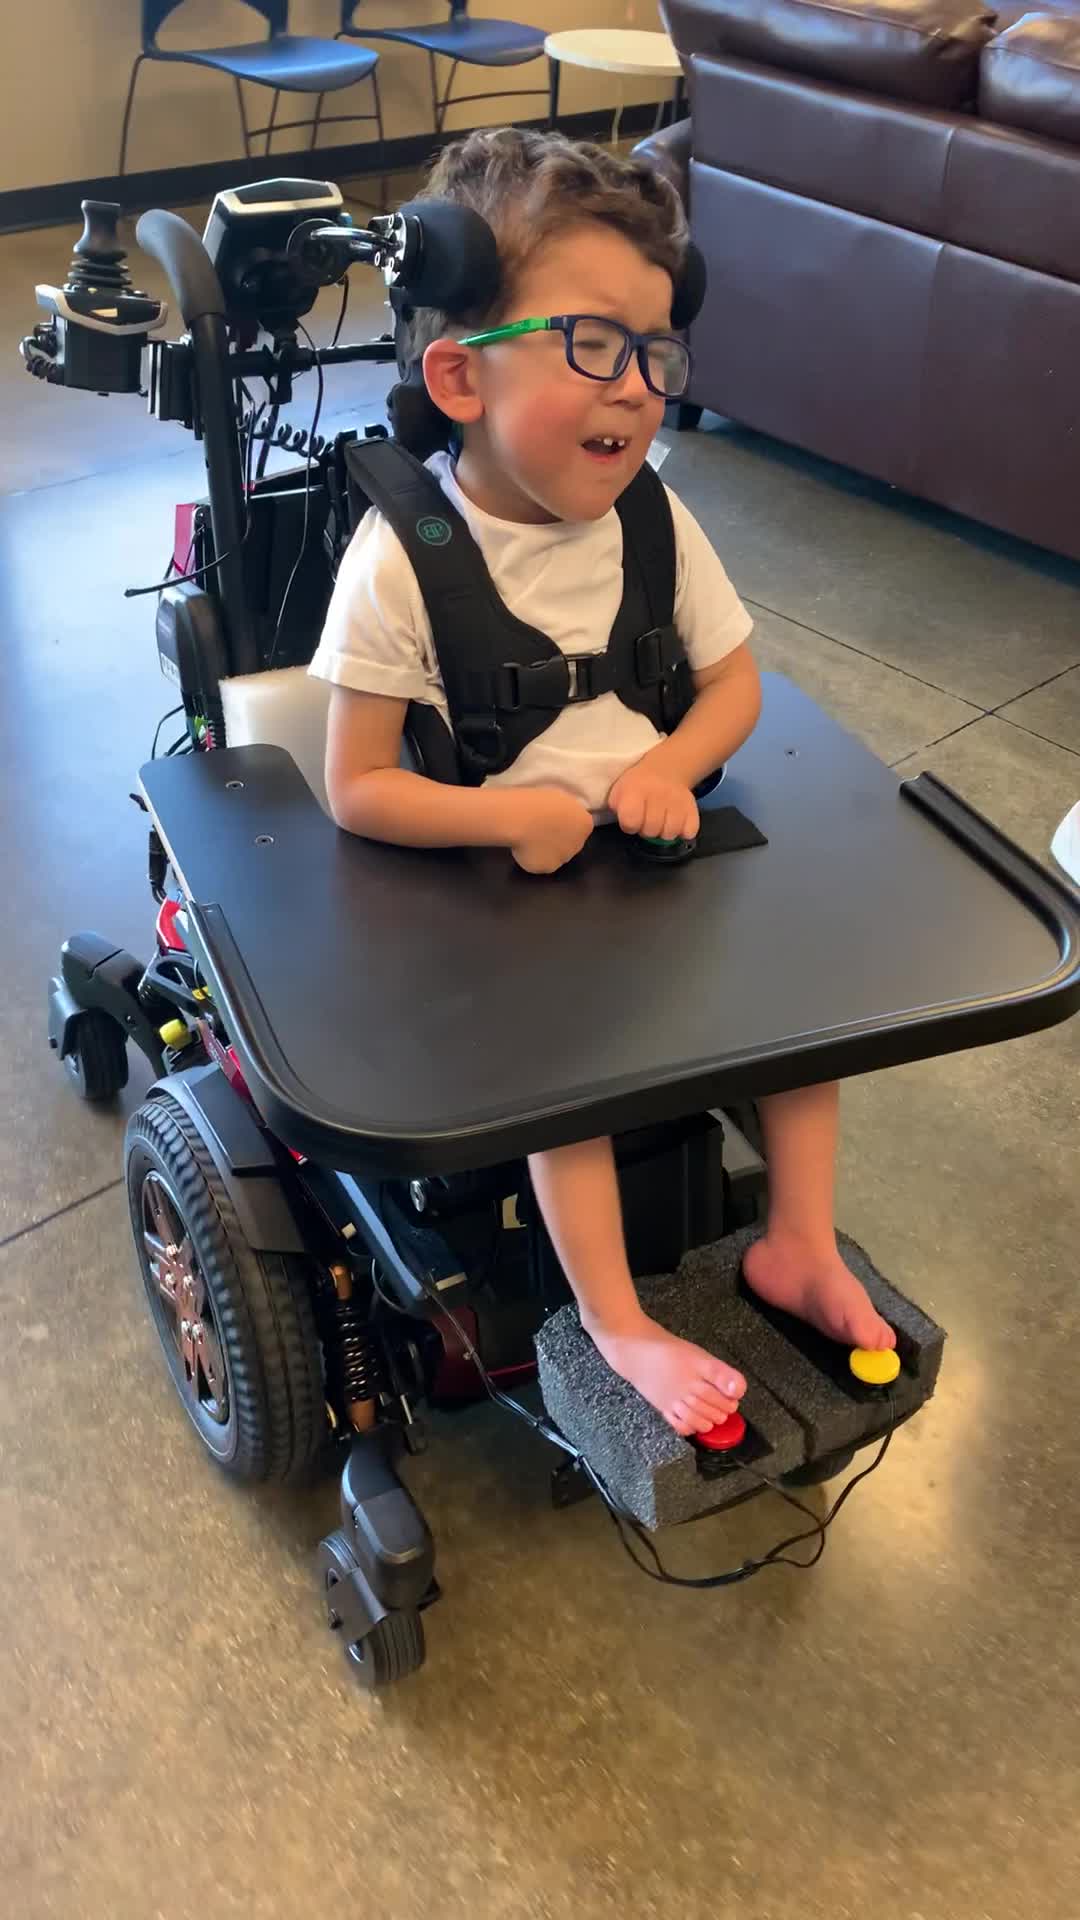
He also uses his left hand for forward control. We came up with these custom foam foot blocks. He is able to activate these with socks and shoes, but when we are just starting out, we wanted to make sure he had all the tactile input he could. This video shows him at the equipment suppliers after he received his new power wheelchair.
He's having a good time, and he's only three in this video and he's really a very good driver.
Switch Site Hierarchy- Lower Extremities (5)
LE Options
- Medial knee
- Lateral knee
- Superior knee - Jacob
We then move on to the lower extremities, and these are further down our hierarchy because moving the entire leg takes a lot more effort. It's not as isolated or controlled. It is possible to place switches by the medial knee, as in Figure 23.
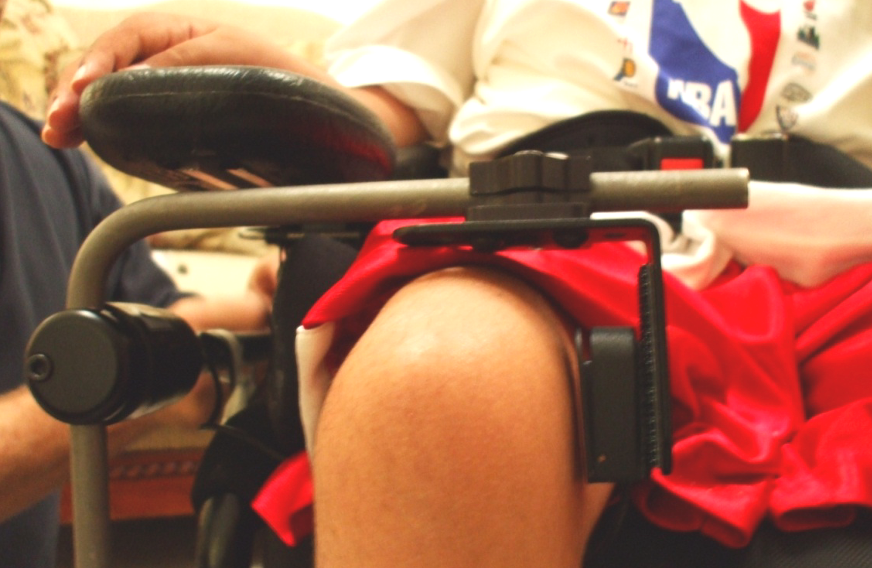
Figure 23. Microlight on a Gaitlin mount at the medial knee.
Mounts can also be placed laterally or superiorly.
Medial Knee
- Adaptive Switch Labs proximity switches
- On custom mounts by medial knees
Figure 24 shows another example of medial knee switches.
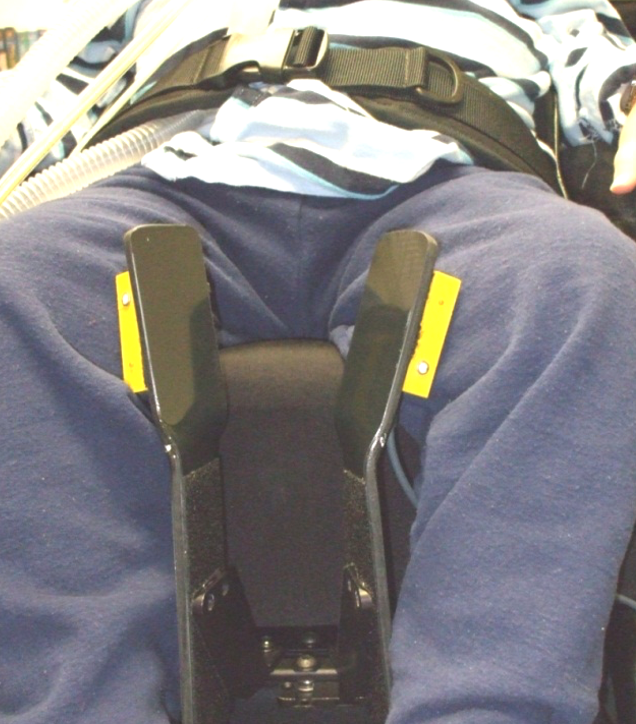
Figure 24. Medial knee custom mounts.
Lateral Knee
- AbleNet Jelly Bean switch
- Mounted to lateral knee support hardware
- The client used right hip abduction to activate
- Hand is crossed over the body, sometimes pushed leg into a switch
Figure 25 shows a client that uses a right thumb to access a fiber optic switch, but he also uses a switch on the medial side of his right knee. He has spinal muscular atrophy, and these are often movements that people have control over.
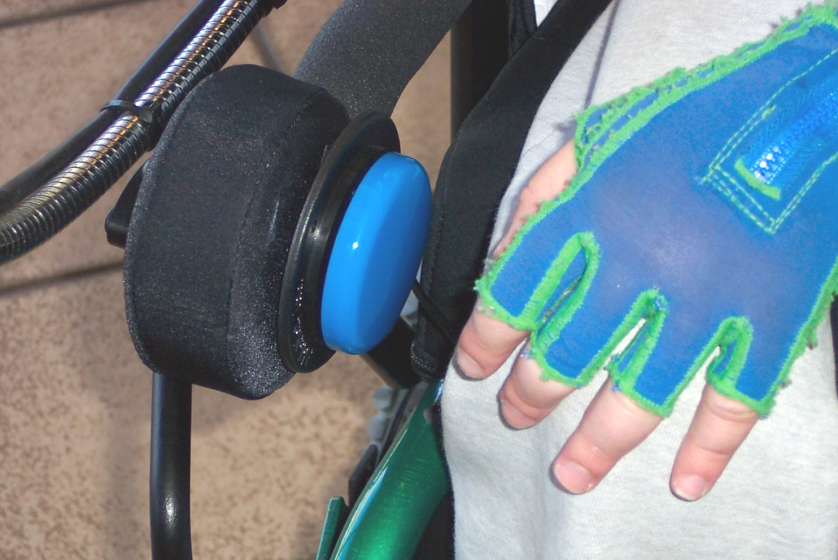
Figure 25. Lateral knee mount and fiber optic switch.
In this case, this young man has a brain injury. That is actually his left hand crossed over his body, and he uses his right leg. He abducts at the hip to activate this switch. He didn't have much functional use of his hands but wore these gloves because they were hypersensitive, as he could not tolerate touching things with his bare skin. We mounted this switch to some lateral knee support hardware to limit excessive hip abduction. We eventually removed the pad and attached the switch directly to the platform below it.
Superior Knee
- Jacob
- 8 years old
- Cerebral palsy with dystonia
- Good control over the knee
- Stopped using this location successfully-why?
- Team’s solution
- Find another switch site
- Possibly try another switch type
Jacob was eight years old. He had cerebral palsy with a lot of dystonic movement. He had very good control over one of his knees, and that was the only place that he had successful, consistent switch control. Again, with dystonia, it is hard to find consistency in any switch access. We mounted the switch underneath his tray (Figure 26), and he was able to lift his knee and access it.
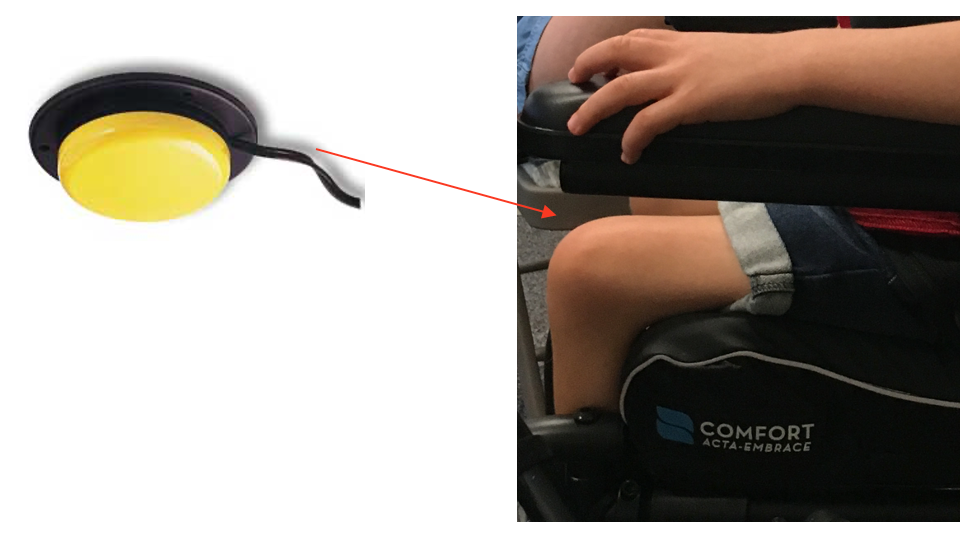
Figure 26. AbleNet Jelly Bean is attached to the bottom of the tray.
However, he stopped using this location successfully. We weren't sure why until we had a chance to see him. The team's solution at school was to find another switch site and possibly try another switch type, so they referred him back to our clinic.
- Assessment
- Jacob had grown
- As a result, the seating system was grown
- As a result, the tray was raised
- The switch was mounted to the underside of the tray…
- He could no longer reach it
- Instead of changing locations or switch types, we lowered the switch
- Success!
When we assessed Jacob, we found that he had grown, and as a result, the supplier had grown the seating system. Unfortunately, we didn't see him after that. As the seating system was grown, the tray was also raised, and because the switch was mounted to the underside of the tray, it moved the switch out of reach for Jacob.
- He could no longer reach it.
- Instead of changing locations or switch types, we lowered the switch.
- Success!
Instead of changing locations or switch types, we simply lowered the switch, and he was once again able to use it. Sometimes the solution isn't as complex as we think. We just have to think a little harder. Jacob, with his new solution, is shown in Figure 27.
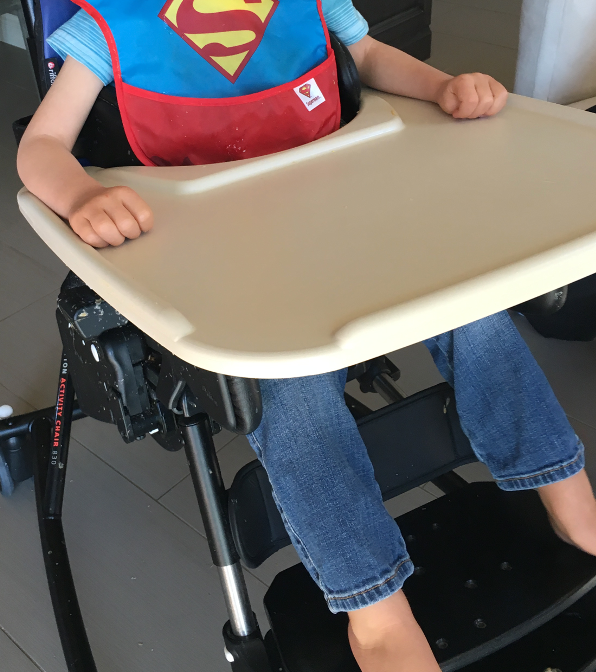
Figure 27. New tray/switch set-up for this client.
Question Time
- My client needs more than 1 switch. How do I choose where to put each switch?
- Power Wheelchair –
- Strongest – Forward
- Weaker – Left and Right
- Weakest - Reset / Mode
- It also helps to place the switch in the direction associated with the activation/
- Power Wheelchair –
When determining the placement of switches for clients, especially those who rely on power chairs or communication devices, it's crucial to tailor the setup to meet their specific needs. Here are some important factors to consider when deciding where to position these switches.
First and foremost, identify the client's strongest switch site, the one they can consistently and reliably activate. This site should be reserved for their primary function, such as propelling the power chair forward for those using mobility devices.
Weaker but still efficient switch sites can be designated for secondary functions. For power chair users, these might include turning left or right, while communication device users might employ them for navigating through options or performing secondary tasks.
The weakest switch site can serve the purpose of mode changes, allowing the user to switch between different functions. In a power chair, this switch might be responsible for altering the chair's mode of operation and controlling features like power tilt or speed adjustments.
To make the operation more intuitive, place the switches in positions that correspond to the direction of the action they control. For example, if the client's right switch initiates a rightward movement, position it under their right side, like under their right foot. This ensures the user can easily understand and operate the controls.
Remember that switch placement should always be highly individualized. Take into account the client's physical capabilities and preferences to ensure that the placement is comfortable and ergonomic for them.
For individuals using two-switch scanning on communication devices, it's advisable to designate the stronger of the two switches as the "move it" switch, which allows them to advance through choices and select options efficiently.
In the end, the primary goal is to provide clients with the most accessible and user-friendly control and communication experience. To achieve this, it's essential to conduct regular assessments and maintain open communication with the client, making adjustments to switch placements as their needs evolve over time.
- My client needs more than 1 switch. How do I choose where to put each switch?
- 2 switch scanning
- Strongest – Move It (have to activate more frequently)
- Weaker - Select
- 2 switch scanning
How does two-switch scanning work? Let's say I have two switches, one on each side of my head. I use one switch to move the highlight from one vocabulary selection to another. When I reach the one I want, I select it with the other switch. This means I have to activate the switch more frequently to navigate through my vocabulary. This is where having the strongest switch site becomes crucial.
Switch Site Hierarchy- Upper Extremities (6)
UE Options
- Above shoulder
- Behind elbows
- Forearms
Now, we're going to move further along to the upper extremities. Again, this is further down because this is a larger movement, and we're using the entire arm. We can place a switch above the shoulder, behind the elbow, or by the forearm. This young lady in the next video is able to use a switch behind her elbow.
Video #6: Upper Extremities
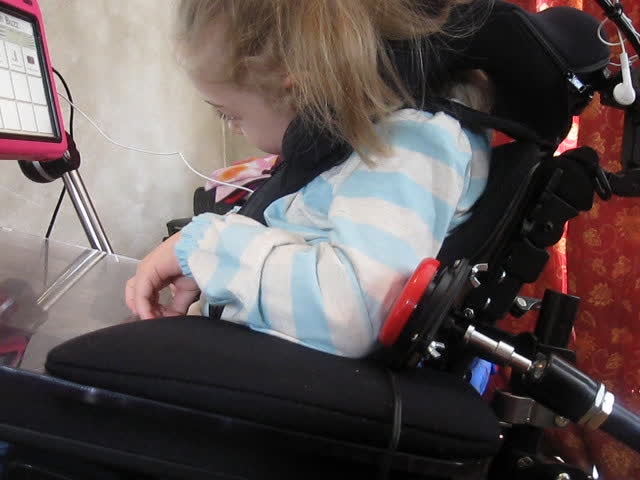
She's using a communication device to send infrared signals to a toy Buzz Lightyear. She was far more excited to control Buzz Lightyear and boss him around than talk to us, so she did very well with a switch at this location.
Above Shoulder
- Lower on the hierarchy as this is a difficult movement to repeat and sustain
On the left, we see a young man, Figure 28, who has a temporary switch mount holding a switch above his shoulder.
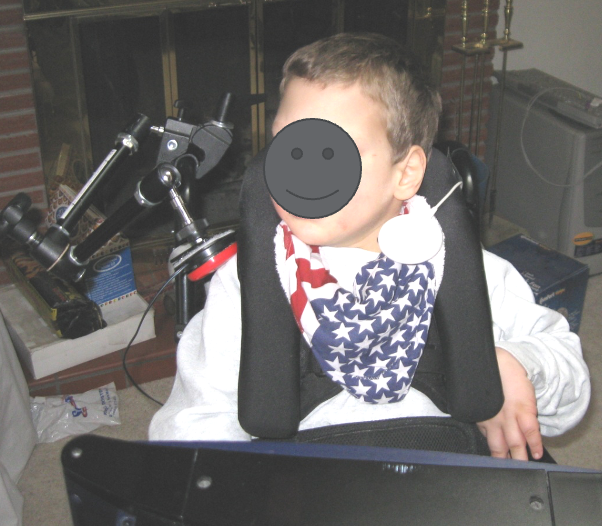
Figure 28. A boy using an AbleNet Jellybean on a universal switch mount.
In Figure 29, we see a Microlight switch on a gooseneck that is attached to the head support. This young lady is using a small movement of her shoulder to hit the switch.
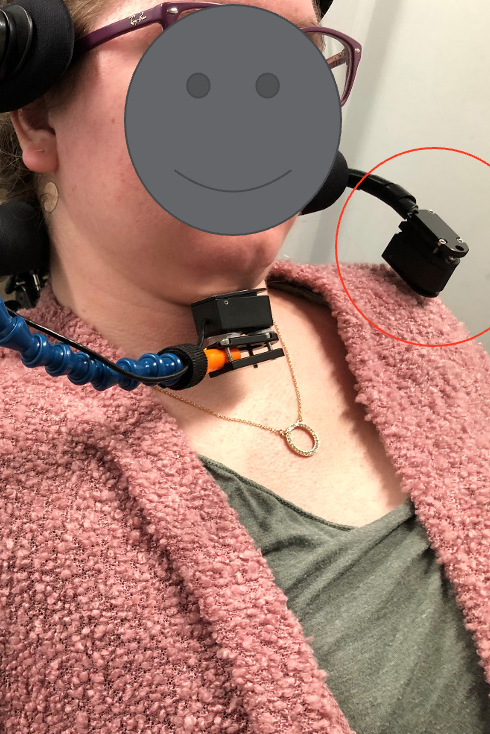
Figure 29. Woman using a Microlight on Stealth Products Gooseneck mount off head support.
Again, this is further down the hierarchy because imagine lifting your shoulder over and over throughout the day. It's hard work, hard to repeat, and hard to sustain.
Let's Get Practical
Where do you think you might try and place a switch on the client that you identified? Write it down, and hopefully, you can give it a try.
Switch Types
Let's move on to switch types.
- Mechanical
- activation pressure
- travel
- Electrical
- no pressure
- travel often required
- less feedback
There are two main switch types, mechanical and electrical.
Mechanical switches require some degree of activation pressure, and an example of that is this AbleNet Jelly Bean switch, as seen in Figure 30.
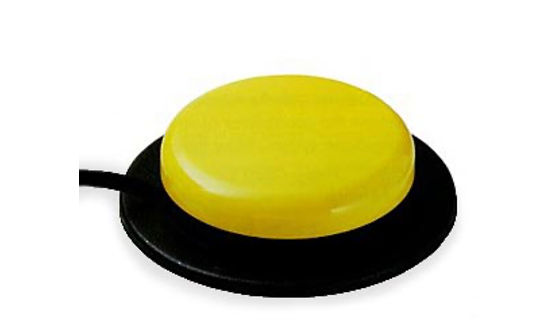
Figure 30. AbleNet Jelly Bean mechanical switch.
There's also travel required. The client has to reach out to the switch, but once they get to the switch, there's a certain amount of distance that has to be traversed in order to activate the switch.
For electrical switches, there's no pressure required, but you have to get within proximity to the switch (Figure 31).
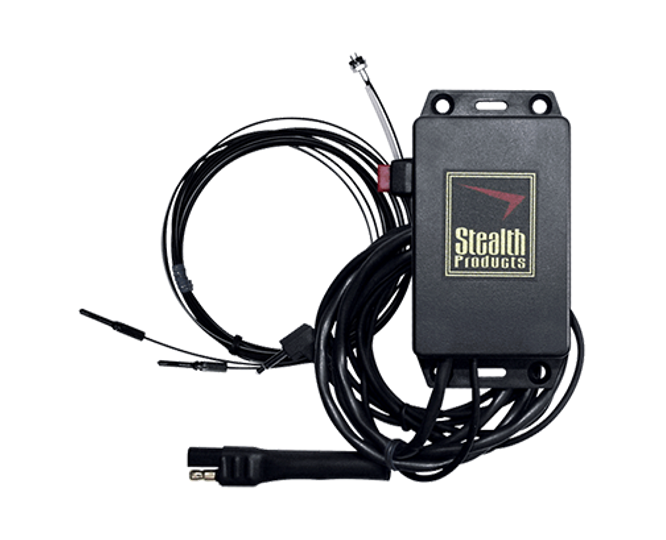
Figure 31. Stealth Products Fiberoptic electrical switch.
However, travel is often required to get within the activation range of that switch, and there's also less feedback. For example, most mechanical switches give you a nice clicking sound when you activate them. The electrical switches either make no noise at all or a very subtle noise. Some clients benefit from more feedback.
- This list is current as of the date of this initial presentation
- Some switches will be discontinued, and new ones added
- This list is not all-inclusive. Check out the manufacturer’s website for further information.
As of this morning of this live presentation, I removed one switch that has been discontinued. This happens all of the time as some switches are discontinued and new ones are added, but hopefully, this will give you an idea of many of the switches that are available. This list is not designed to be all-inclusive, but it is designed to represent different areas of switches.
- Some switches are very enticing.
- Accommodate sensory limitations, such as vision impairments
- Encourage the client to activate the switch
- These may be helpful initially; however, the switch is a tool, not an activity.
You can check out each of these manufacturer's websites for more information. Some switches are very enticing.
When we look at these particular switches from Enabling Devices (Figures 32, 33, and 34), they say reach out, touch, and play with me.
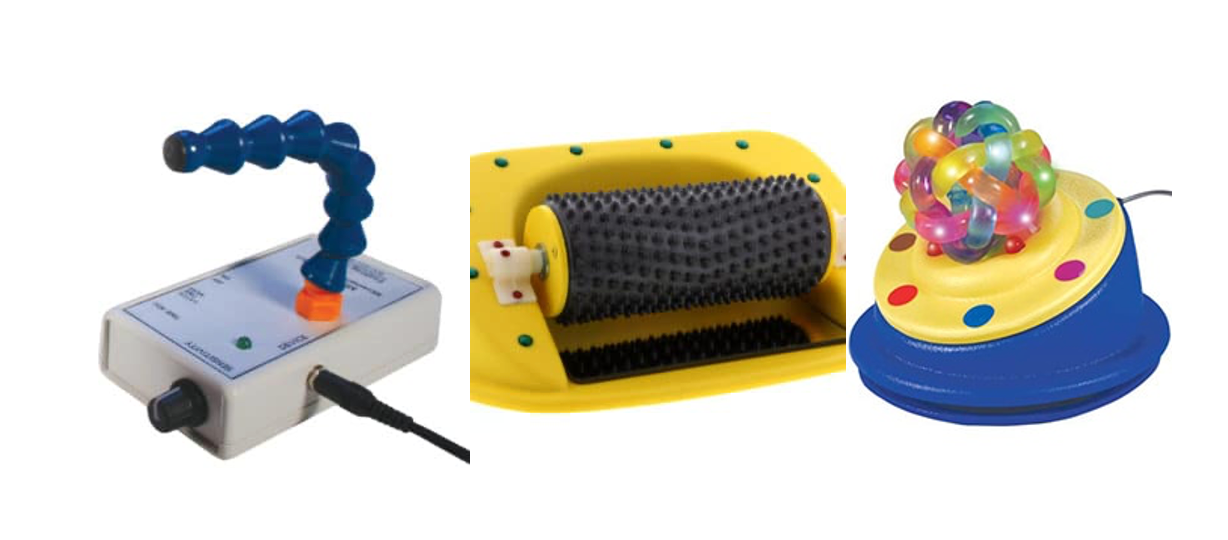
Figure 32. Enabling Devices Movement Sensor Switch, Roller Switch, and Textured Orbit Ball Switch.
Sometimes these accommodate certain sensory limitations, such as if the client can't see the switch, and they can get tactile input instead. But mostly, these switches are designed to encourage the client to activate the switch. These can be helpful initially, but what happens is the client sometimes has so much fun playing with the switch, that they don't realize it's a tool to control something else, which is not the goal of the activity. I don't use these personally too much because I need my client to focus on the device we're trying to control.
Mechanical Switches
Activation Requirements
- Travel
- Intermittent or sustained pressure
- Varies with the device being accessed
Mechanical switches require some degree of travel, and intermittent or sustained pressure to activate, depending on what we are controlling.
Mechanical Switch Types
- Plate
- Light Touch Plate
- Lever
- Pneumatic
- Other
The mechanical switch types are plate, light touch plate, lever, pneumatic, and a hodgepodge of other mechanical switches.
Increased Tone Considerations
- Durability
- Feedback
- Sensitivity
- Balance of durability and sensitivity
- If the switch requires too much force to activate, these clients may “hit” harder.
Keep in mind a few considerations if you're working with someone who has increased tone because many people with increased tone require switches for access. It's important to make sure the switch is durable. The client may contact the switch with a great deal of pressure, if not consistently, then once in a while, so it's important the switch isn't going to break easily. People with increased tone often need a lot of feedback, so it's important to keep in mind if the switch has a nice crisp click upon activation. It also has to be sensitive enough for the client so they don't need to use a large amount of force to activate it. We have to find a balance of durability and sensitivity. If the switch requires too much force to activate, the client may hit, or contact it harder, and we don't want them to use more force than what is required.
Plate Mechanical Switches
- Plate switches resemble a plate
- Round, available in various sizes
- 3 main sizes
- Multiple colors
- Activate anywhere on the top surface
- Travel, force, and feedback vary
- A client must be able to clear the sides of the switch to activate.
We're going to start with the category of mechanical plate switches because they look kind of like a plate (Figure 33).
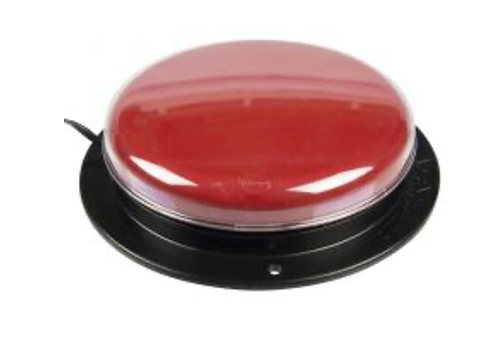
Figure 33. Example of a plate switch by AbleNet.
They're round and available in three main sizes. They're often available in multiple colors and activate anywhere on the surface. If the client barely touches the edge or pushes right in the center, it will still respond. Travel, force, and feedback are going to vary between these switches, and the client has to be able to clear the sides of the switch to activate it. They will need to get up and over it if they're using a hand, for example.
- AbleNet
- Big Red
- Jelly Bean
- Specs
- Buddy and Big Buddy Switches
Let's start with AbleNet, as they have very common switches (Figure 34).
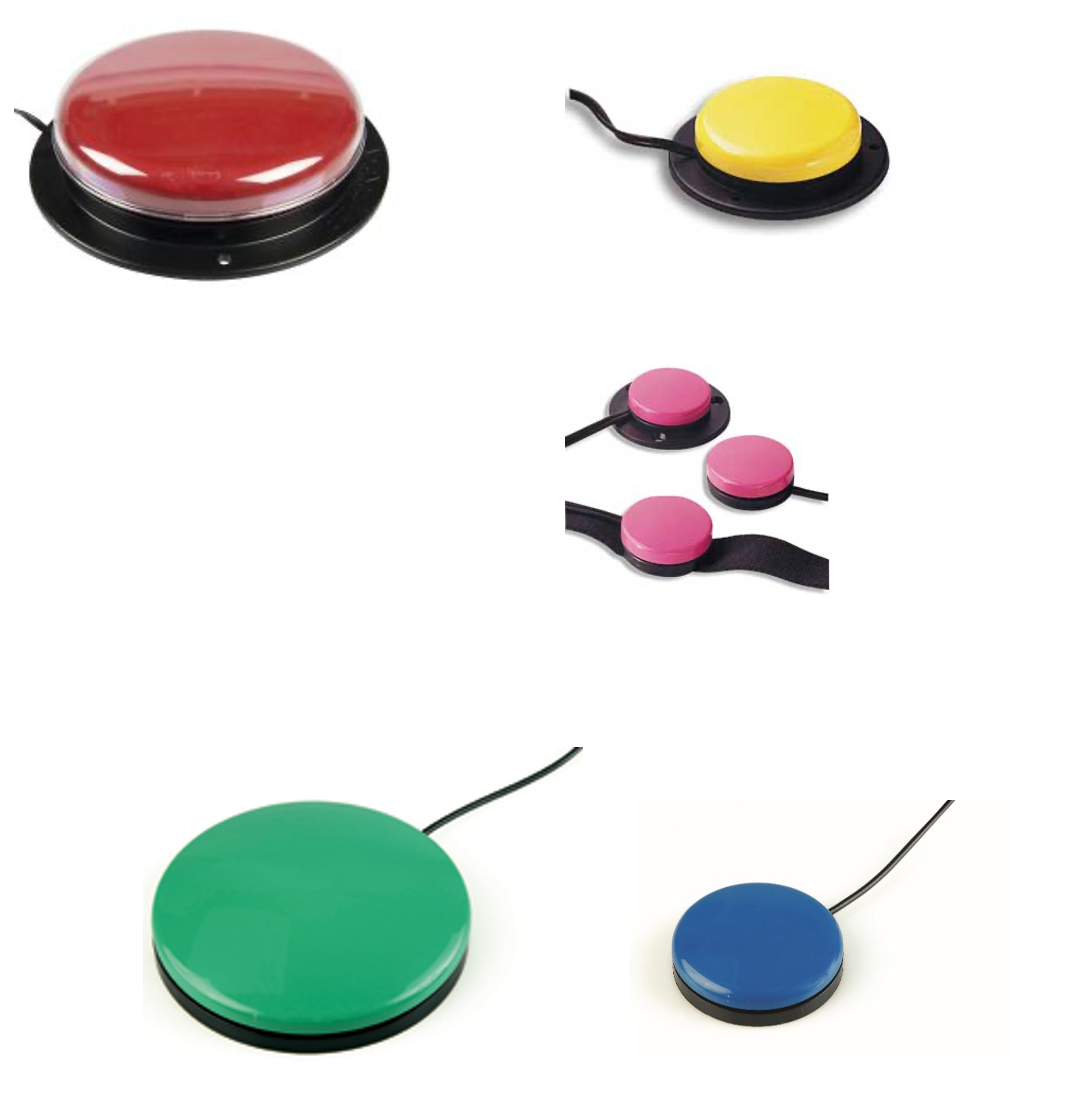
Figure 34. Examples of AbleNet switches.
I use them quite a bit in evaluation because they provide good feedback and have a good balance of durability and sensitivity. They don't break easily, require a lot of force, and come in these three nice sizes.
The Big Red actually comes in other colors, but the red switch you see pictured in Figures 33 and 34 is about five inches across. The Jelly Bean, the yellow one in Figure 34, is about three inches across, and the Specs (pink) is about an inch and a half. As I mentioned before, the Specs come with three different bases, which allow you to use it in different applications. AbleNet also sells the Buddy and Big Buddy switches which are similar in size to the Big Red and the Jelly Bean. They require a little more force.
- Adaptivation/Origin
- Orby Switch
- Inclusive TLC
- Smoothie

Figure 35. Switches by Adaptivation and Inclusive TLC.
Adaptivation, also known as Origin, sells the Orby switch, which is very similar to the Jelly Bean switch but a little more high profile.
Inclusive TLC sells the Smoothie, which is similar in size to the Big Red. They also have a smaller version which is similar in size to the Jelly Bean. A unique thing about the Smoothie is that it's tapered on one side in an effort to reduce that vertical lift that the client has to achieve to activate the switch to get over the edge.
- Enabling Devices
- Jumbo
- Gumball
- Mini Gumball
- Plate
- Compact
Figure 36 shows plate switches by Enabling Devices.
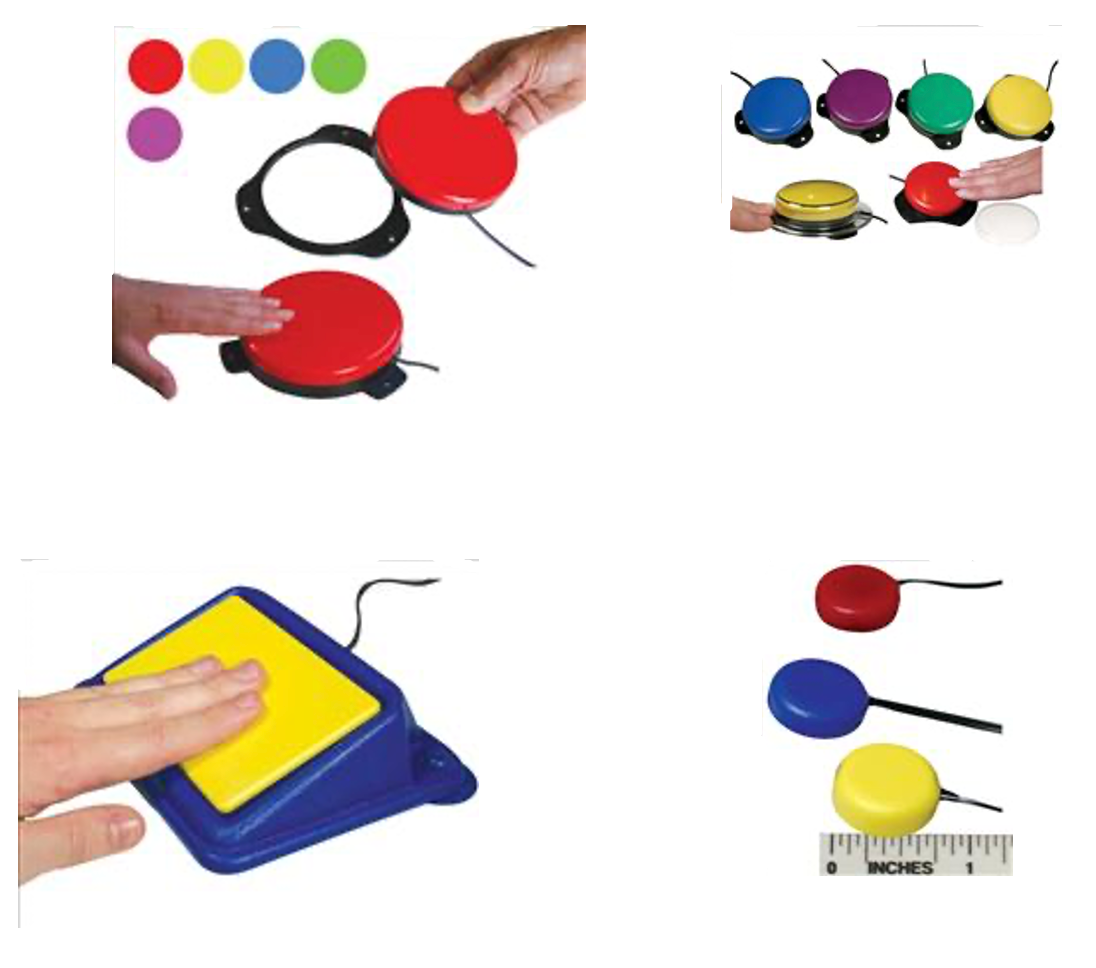
Figure 36. Plate mechanical switches by Enabling Devices.
The Jumbo, which is pictured on the upper left, is about the size of a Big Red. The Gumball and Mini Gumball are similar to a Jelly Bean and Specs. The Compact, which is on the lower right, is similar in size to the Specs, but a little smaller.
There's also a switch that they simply call the plate switch and that's pictured on the lower left. It's the yellow rectangle on top of the blue base. I'm not a big fan of the plate switch. It attaches to a tray with suction cups that don't tend to stick very well, especially after a little bit of use. There's also not a lot of feedback when you push that rectangle, but it is placed at an angle, and that can be helpful for some clients.
- Stealth Products
- Egg switch
- Sealed
- Little feedback
- Requires moderate activation pressure
Stealth Products has the Egg switch (Figure 37).

Figure 37. Stealth Egg Switch.
It's very shiny and comes in different colors. It's also sealed, meaning that moisture, dirt, grime, and dust can't get in there. It doesn't provide much feedback, and it requires a fair amount of activation pressure. Due to this, I don't use this as often as other switches in my own practice. It does work well for a client who's going to use a lot of force, and needs something that's fairly durable, and that's sealed.
Light Touch Plate Mechanical Switches
- Usually too fragile and too small for clients with increased tone and force
- Very sensitive, while still being a mechanical switch
- Travel and activation force requirements are reduced
We then have light touch plate switches. The nice thing about these is they require a reduced amount of force, but they are usually too fragile and small for clients who have increased tone and force.
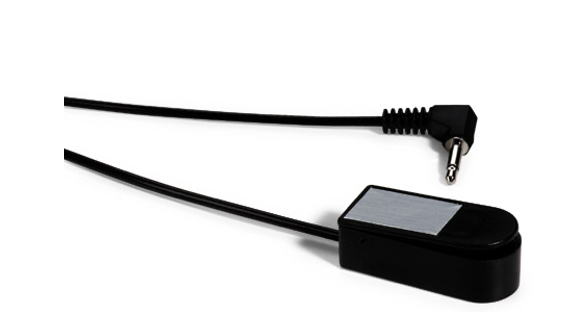
Figure 38. Microlight Switch.
These work really well for clients who don't have a lot of force. Since they're small, there's not as much travel or activation distance required.
- AbleNet Microlite/Microlight
- Personalize with Color
- Also available through Stealth Products and other manufacturers
Per the handout, I have labeled things that are in my "tool bag." You may be thinking this is great, but I can't afford to buy 200 switches. I use some of these switches a lot in evaluation. It may not be the final switch that I recommend, but they work really well for evaluation, and sometimes as a final switch determination as well.
Depending on the manufacturer, sometimes it's spelled in two different ways (Microlight/Microlite). It's available from AbleNet, Stealth Products, and other manufacturers as well. You can see it has a silver rectangle on there. It comes with a number of stickers so you can change the color. This may be helpful if you're working with a client who's using several of these, like controlling a power wheelchair, for example. You can have a different color to represent the function of each switch.
In Figure 39, there's a young girl who has significant muscle weakness. Her arm is resting on a pillow on top of a tray, and the Microlight switch is Velcroed to that tray on its side. She uses her thumb with a very small weak movement to activate the switch, and it works very well for her.
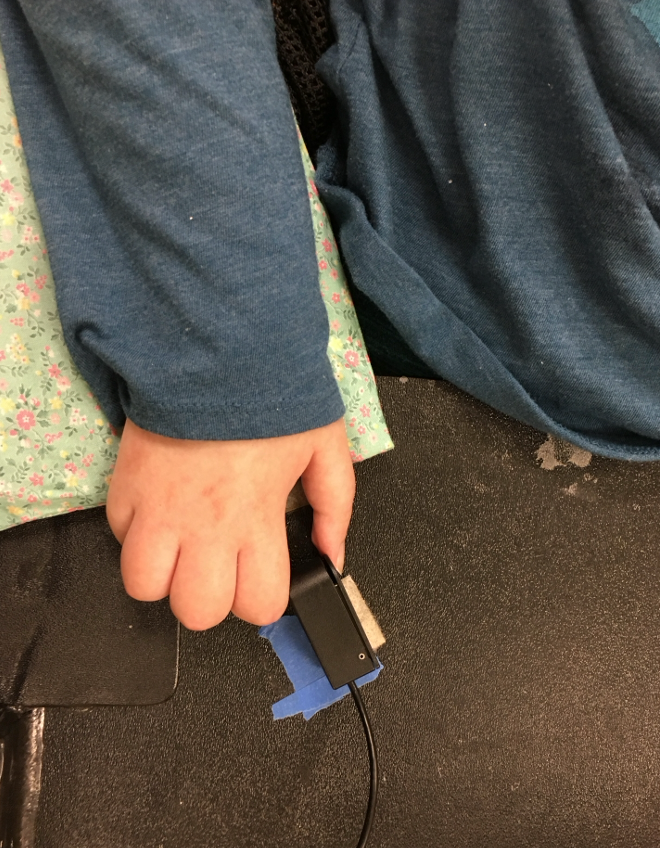
Figure 39. Client using an AbleNet Microlite/Microlight switch.
- Adaptive Switch Labs (ASL)
- Ultra Light switch
- Contoured
- Extremely light touch
- 5 different color strips for the top
- 2 tap holes for mounting
A similar switch is from Adaptive Switch Labs or ASL, called the Ultra Light switch. What's nice about this is it's also very sensitive like the Microlight, but it's contoured. Instead of moving over that boxy edge, you have a nice tapered edge, and that can make this a little easier to activate. It comes with five different colored strips so that you can choose the color that the client likes, or to represent the function of the switch. Underneath, there are two little tap holes under the switch. The Microlight has one as well, and that can be helpful for mounting. You don't want to screw into the bottom of switches if there's not a tap hole, because you can destroy the switch.
- Adaptivation Pal Pads
- 3 sizes
- Very sensitive, responds to touch
- Very low profile
Another light touch plate switch is the Adaptivation Pal Pads, as seen in Figure 40.
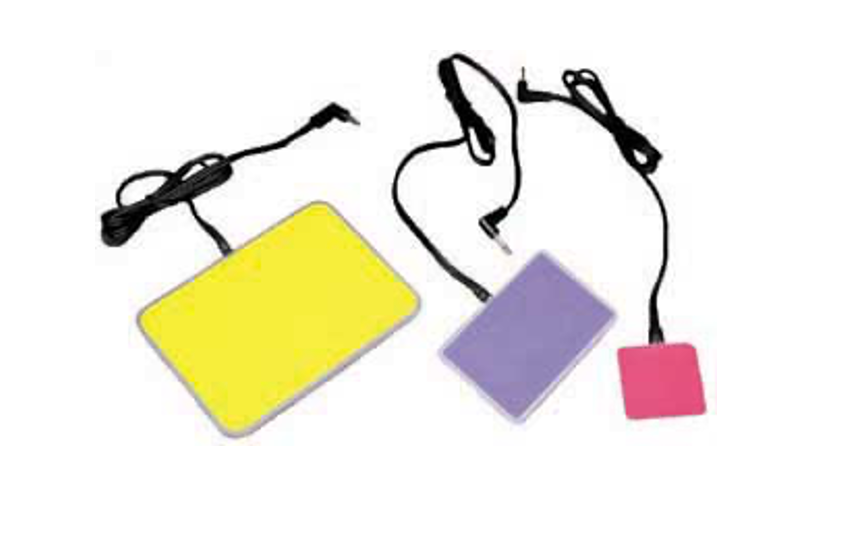
Figure 40. Adaptivation Pal Pads.
These come in three different sizes, are sensitive, and respond to touch. They are only about as high as a credit card, so it is very easy to get over the top. These, too, are fragile and easy to break.
- Enabling Devices
- Saucer
- Larger size, though still light touch
- Mini saucer
- Contoured to limit vertical movement requirement
Other more sensitive plate switches include the Saucer and Mini saucer from Enabling Devices.
Figure 41. Saucer and Mini Saucer from Enabling Devices.
The Saucer is a little bigger than the Big Red. The Mini saucer is around the size of a Jelly Bean. It looks like a flying saucer, but one of the advantages to that is since it's contoured on the sides, it might work better for a client who has difficulty getting up and over the surface of the switch itself.
- Stealth Products Mo-vis Twister Switches
- Light force
- Mounted on a dome
- Other mounting options, as well
- Various colors
Mo-vis Twister Switches are newer and available through Stealth Products in the United States (Figure 42).
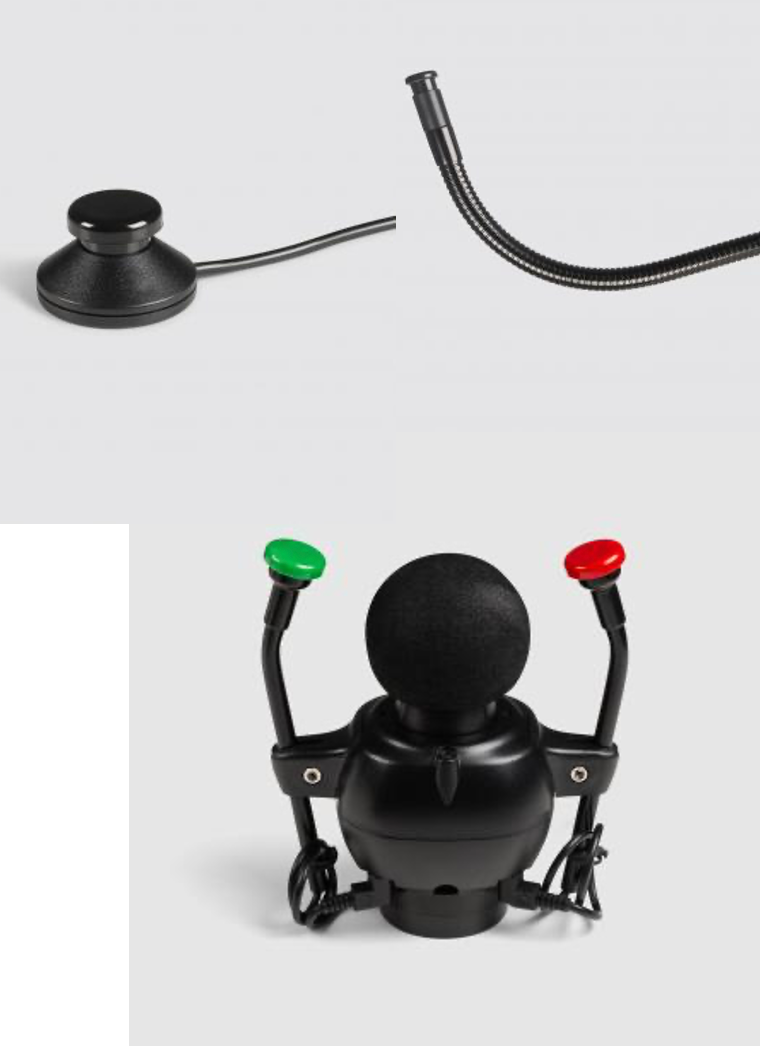
Figure 42. Stealth Mo-vis Twister Switches.
They're made by Mo-vis, which is located in Belgium. The Twister Switch has a very light force requirement, about 30 grams, and lots of mounting options. The upper right example can be mounted to the end of a gooseneck. They can also be attached to a joystick so that if someone's using this compact joystick and be moved from one side to the other with a finger or chin. Most often, these are used for powering on and off the chair or changing modes. You can also see the dome option in the top left. These come in different fun colors.
Lever Mechanical Switches
- Less common than in the past
- One portion of the switch is moved (lever) to activate a small switch mechanism on the other end.
- May require large movement
- Can accommodate large client movement with less impact as the client can move “past” the switch and return in many cases
Lever switches used to be much more common for control of assistive technology. The Ultimate Switch from Enabling Devices is a nice lever switch that's available. One portion of the switch is moved, the lever arm, to activate a very small switch mechanism at the other end. It sometimes requires a larger movement as a result, and if you push on the opposite end of that lever, you probably won't activate the switch.
The nice thing about accommodating large movement is that, in the case of the Ultimate, the client can move with a large movement and be accommodated with less impact because the client can actually move past this lever and then come back again, instead of colliding with a solid surface. Let's say we put a Jelly Bean by this young man's head. When he hits that Jelly Bean, he's going to come to a hard stop. The lever-style switch moves. If he uses more erratic travel or force to his movements, this will capture that, and give him more of a soft place to land.
- Enabling Devices Ultimate
- Accommodates large and forceful movements
- If activated with force, this can ‘bounce’, resulting in multiple activations.
- Finger Switch
- Captures very small and low-force movements
- Fragile
Figure 43 shows this style of switch.
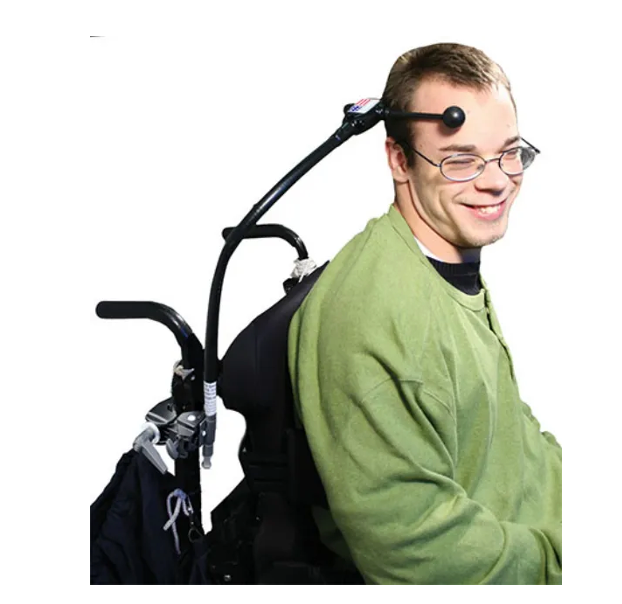
Figure 43. Enabling Devices Ultimate.
One thing to keep in mind with this if you hit it with force (like the swiping motions of someone with poor motor control), it might bounce back and forth a little bit before it settles down, resulting in multiple switch activations in whatever device you're controlling.
There are also lever switches that are designed to capture finger movement, and this is an example of the finger switch from Enabling Devices in Figure 44.
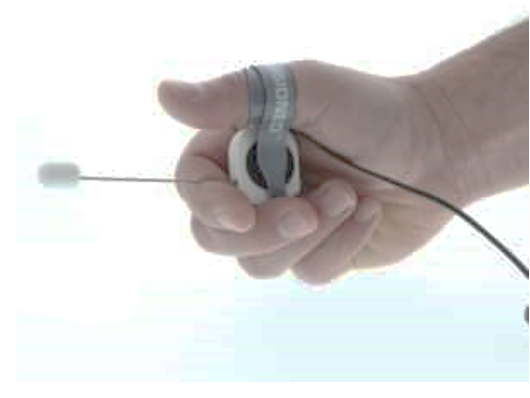
Figure 44. Enabling Devices Finger Switch.
It captures very small, low-force movements. It is very fragile, so that's something to keep in mind.
Pneumatic Mechanical Switches
- Grasp Switches
- Grasping the handle changes air pressure and activates the switch
- Release may be difficult for clients with increased tone
- The client may drop the switch when not grasping/activating
We mentioned how grasp switches are tricky because the client might drop them inadvertently. The grasp switches that are on the market are actually pneumatic switches. When someone squeezes that switch, it's moving air within the switch, and that's what activates it. There are two options here. Enabling Devices has their Cushion Grip switch, shown in Figure 45.
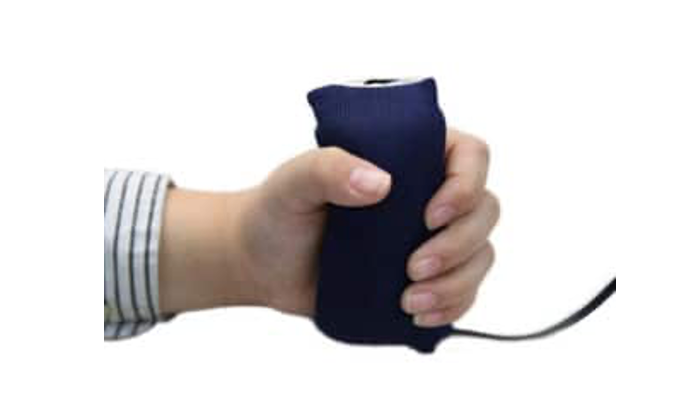
Figure 45. Enabling Devices Cushion Grip Switch.
It comes in two sizes to better accommodate the client's hand size. They also have the Grip and Puff switch as a newer option. It does include a Sip 'n Puff, but it only registers the puff portion of it. As it includes a grasp switch, someone can use either one.
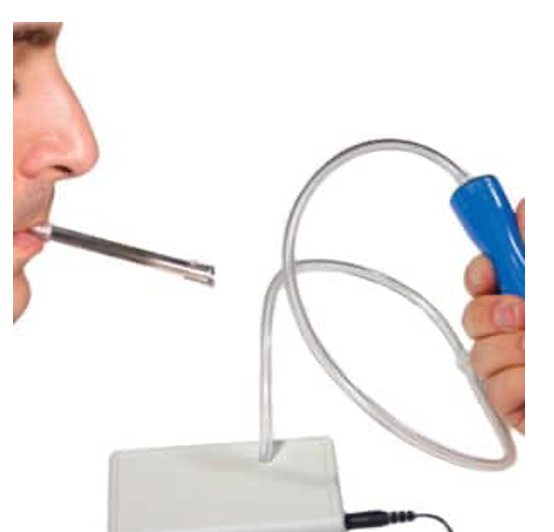
Figure 46. Enabling Devices Grip and Puff Switch.
- Sip ‘n Puff Switches
- Responds to changes of air pressure in client’s mouth
- Requires client to maintain air pressure in mouth
- Good lip closure
- Intact soft palate
- Not reliant on breath control
- Intermittent control
- Option for Sustained control through power wheelchair electronics
Pneumatic switches, like Sip 'n Puff, are usually ordered with a power wheelchair, but you can order a separate Sip 'n Puff switch. They can be used to control other assistive technology devices or to help someone develop these skills to use with a power wheelchair in the future. Again, Sip 'n Puff, as we talked about earlier, responds to changes in air pressure in the client's mouth. Figure 47 shows an ASL Pneumatic Switch.
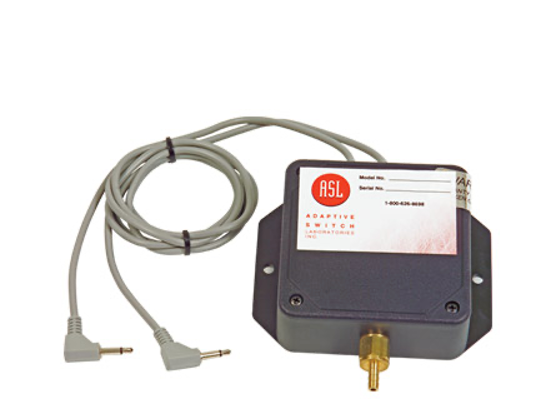
Figure 47. Adaptive Switch Labs Pneumatic Switch.
It requires good lip closure and an intact soft palate so that air pressure is maintained in the mouth, and not lost through the lips or nose. It is not reliant on breath control. This provides intermittent control via a puff or sip. It's difficult to sustain.
There's an option called latch through Power Wheelchair Electronics to allow for sustained control. It's not typically possible or advisable to have someone sustain that level of air pressure in their mouth for a long drive down a sidewalk or a hallway. Instead, the client gives one hard puff when using a power wheelchair, that activates the latch, and the chair will continue to move forward.
The client can give left and right commands to keep that chair on course as it drives down the sidewalk or hallway, and then stop the chair by giving a sip, which is a reverse control.
Other Options
- Designed as a stand-alone switch
- 2 ports so that one device or feature is controlled by Sip and another device or feature is controlled by Puff
- Sip ‘n Puff controls for power wheelchairs are ordered with the power wheelchair and differ from stand-alone options
Figure 47 shows an Adaptive Switch Labs' pneumatic switch. You can see two switch jacks coming out of it, those gray cables. One is for puff, and one is for sip. This allows you to plug in two different items.
These are also available through Stealth Products. Figure 48 shows the i-Connect Sip 'n Puff.
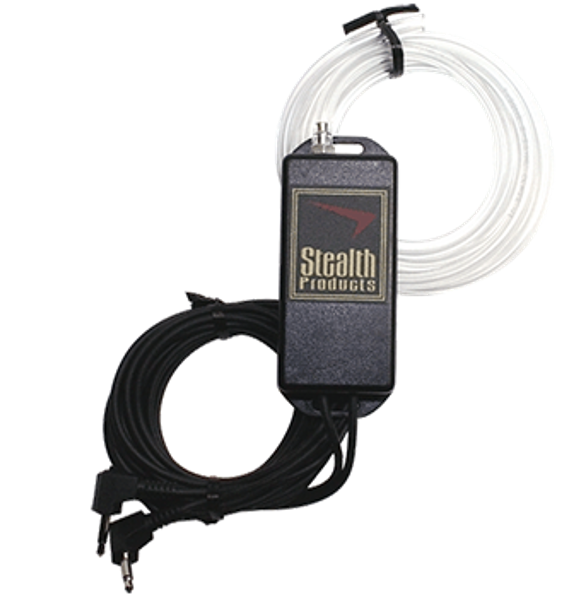
Figure 48. Stealth Products i-Connect Sip n Puff.
Figure 49 shows a combination Grip and Puff switch that will only recognize puff (Figure 49). One device or feature is controlled by sip, another by puff.
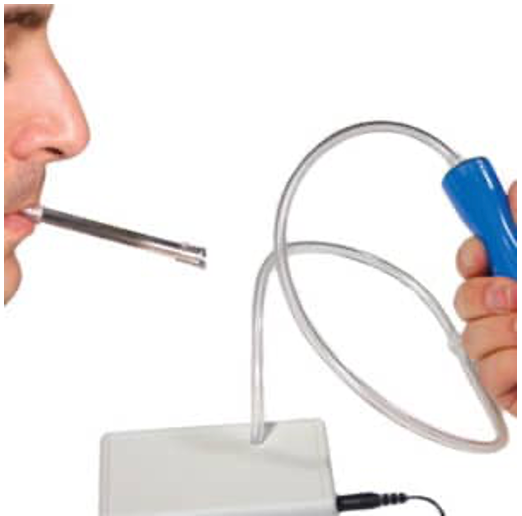
Figure 49. Enabling Devices Grip and Puff Switch (Puff only).
Electronic Switches
Now, we're going to talk about electronic switches.
Activation Requirements
- No activation pressure required
- Activation travel varies
- Power source required
- Often little or no feedback
- Tactile, auditory
- Some will not support sustained activation
- Proximity and fiberoptic switches often come in a multi-switch array for power wheelchair driving.
With an electronic switch, there's no activation pressure required. The amount of travel is going to vary with the switch. There is a power source required, hence the electronic switch. It requires a battery or plugging it into the wall, and there's often little or no feedback. The client's not going to hear that nice crisp click. Some of these also do not support sustained activation. It will only provide intermittent control, so hitting that switch quickly and not holding a switch down. This is important to keep in mind, particularly for power mobility. Proximity and fiber optic switches often come in a multi-switch array because these are most frequently used for power wheelchair driving. If you're interested in more information about driving methods for power mobility, we have courses on that in the library as well.
- These are typically more expensive than mechanical switches.
- Documentation needs to address why a mechanical switch won’t meet an individual’s needs.
These typically cost more than mechanical switches, so our documentation needs to address why any mechanical switch won't work, and why we're looking at an electronic switch instead.
Electronic Switch Types
- Proximity
- Fiberoptic
- Infrared
- Touch
- Sensor
- Piezo Electric Film (detects vibration)
Electronic switches include proximity, fiber optic, infrared, touch, sensor, and this funny stuff called Peizo electric film. We touched on proximity switches earlier because these can be placed in a head array or underneath a tray.
Proximity Electronic Switches
- Proximity Switches are Capacitive switches
- React to conductive surfaces and moisture
- Must be protected from moisture
- Capture larger movements
- Activation distance is typically adjustable
- Usually in a ‘sphere’
Proximity switches are capacitive switches, and they react to conductive surfaces and to moisture. It's very important that the switch itself is protected from moisture because it will activate in the presence of that. We have moisture in our body, and so the switches will react to our body as we approach the switch itself.
These are designed to capture larger movements, and the activation distance is typically adjustable. It's kind of like a ball or a sphere around the switch itself, it gets bigger or smaller. The bigger it is, I don't have to get as close to the switch, but the bigger it is, the switches have to sit further apart because they can activate each other.
- Can be mounted under a tray, as long as the tray is not conductive
- Need feedback on top so the client knows where the switches are
- Are often mounted in a Head Array for power wheelchair driving
These can be mounted under a tray as long as the tray is not conductive. So, if the tray is made out of some sort of plastic material or wood, it will be fine. It's important that the client has feedback as to where the switches are unless the tray is clear. I usually use a tactile cue like Velcro.
These same proximity switches are mounted in a head array oftentimes for power wheelchair driving. There's a switch in the rear pad, so that when the client moves their head rearward, it moves the chair forward, and when they turn their head to either side, the chair will move to the left and the right.
These are examples of proximity switches (Figure 50).
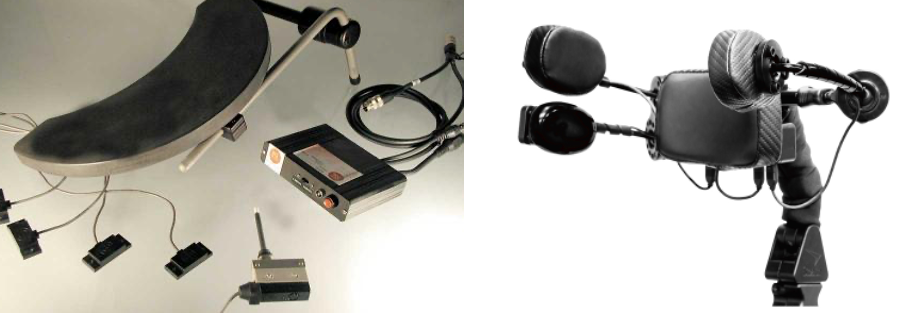
Figure 50. Example of proximity switches.
If these are on a tray, it's important to keep in mind that if a hand, glass of milk, or a cat jumps up on the tray, it will activate the switch. These are things to keep in mind to make sure our clients' needs are being met in a safe way.
- AbleNet Candy Corn
- Big and Little
- Battery
- Adaptivation HoneyBee
- Adjustable range
- Battery
Here are a few proximity switches available on the market in Figure 51.
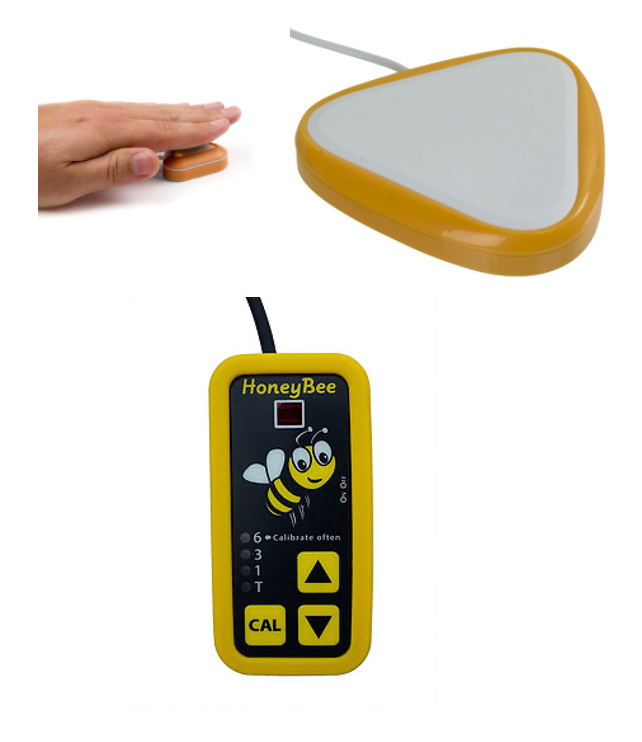
Figure 51. Examples of proximity switches from AbleNet and Adaptivation.
AbleNet has a big and little Candy Corn switch. It runs off of a thin little round thin batteries like what you use in your garage door remote opener. The Adaptivation HoneyBee is an adjustable range proximity switch that also runs on a battery. Both of these work well as a standalone switch rather than as a part of a switch array, or a group of switches for driving.
- Proximity Switches-Adjustable
- Arrays and single-switch versions
- Adaptive Switch Laboratories (ASL)
- Stealth Products i-Connect or i-Drive Array
- Arrays and single-switch versions
In terms of single switch versions and arrays, Adaptive Switch Labs and Stealth Products both make proximity arrays, and they work very well.
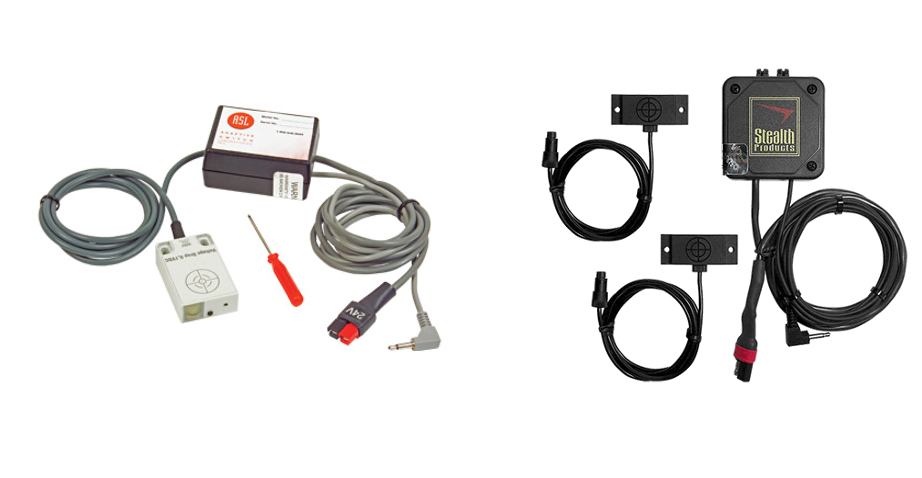
Figure 52. Adaptive Switch Laboratories (ASL) and Stealth Products i-Connect or i-Drive Array.
Video #7: Proximity Switches in a Tray
Here's a quick video showing proximity switches in a tray. In this case, there are three switches in there for forward, left, and right control.
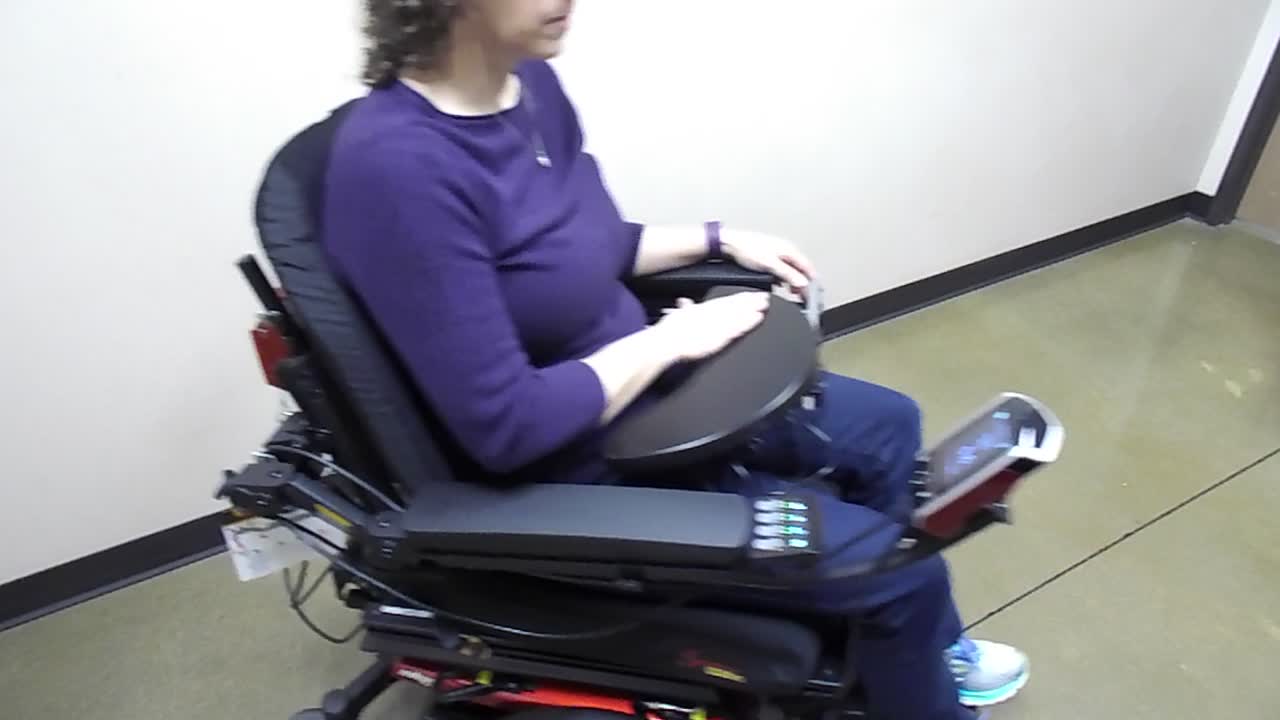
Video #8: Proximity Switches in Head Array
This video shows proximity switches within a head array.
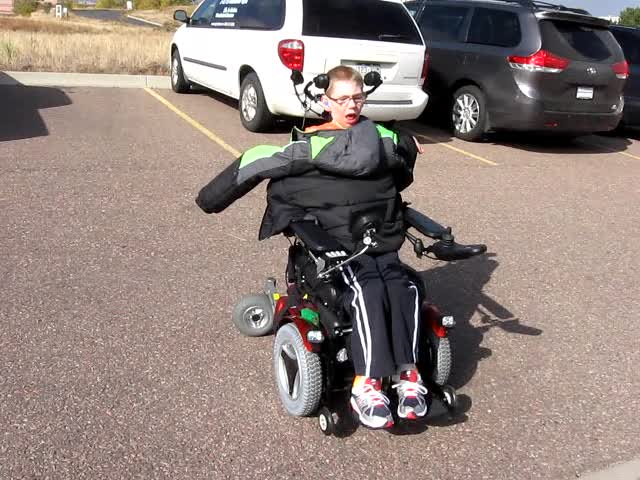
This young man is touching the right side right now, going to the right, now he's getting near to the left side, moving his chair to the left, and if he's in contact with the back pad, he's moving the chair forward. To stop, he simply needs to move his head forward.
Fiberoptic Electronic Switches
- Arrays and single-switch versions
- Captures very small movements
- Adjustable range
- Fragile cables
- Mounting must protect the switch and cable
- Rarely used with clients with increased tone
- Do not use it as an eye blink switch – can cause eye damage
Fiber optic switches require no force and capture very small movements. They are smaller than proximity switches.
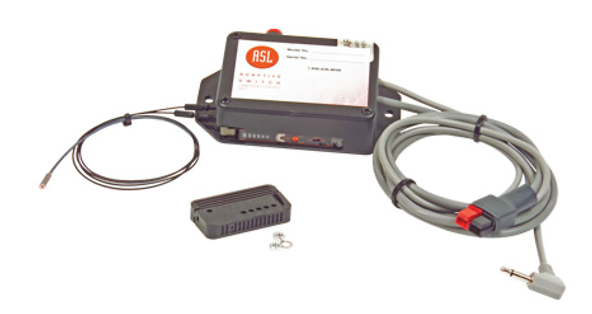
Figure 53. ASL Mini Fiberoptic Switch.
There's an adjustable range where your finger or other part of the body needs to be to activate the switch. I find that the longer the activation distance is, the less consistent it is.
The cables where the fiber optic light is emitted are quite fragile, and so the mounting that we look at needs to protect that cable. As such, these are rarely used in people of increased tone. These are used with people who have very discrete fine motor control and muscle weakness.
It is possible to use a fiber optic switch to capture eye blinks, but we don't want to do so because it can lead to eye damage.
- Adaptive Switch Laboratories
- Stealth Products
Adaptive Switch Labs and Stealth Products make single-switch versions of fiber optics as well as arrays, and the arrays are used in driving (Figure 54).
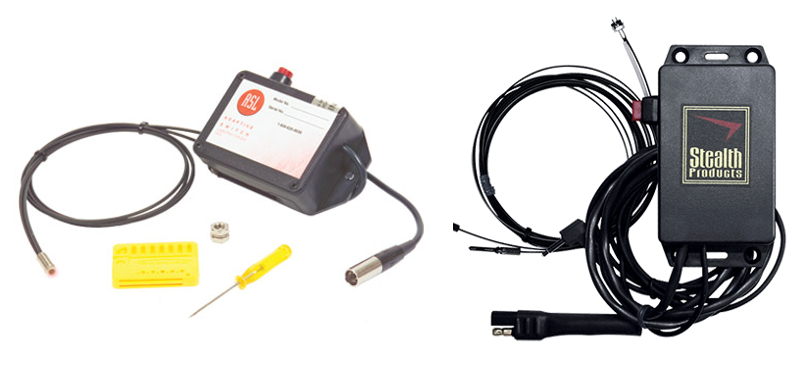
Figure 54. Single-switch examples from Adaptive Switch Labs and Stealth Products.
Single-Switch Mounting
Single-Switch Mounting is very important. Here are some examples of mounting a single switch in Figures 55 and 56. ASL has a headrest mount.
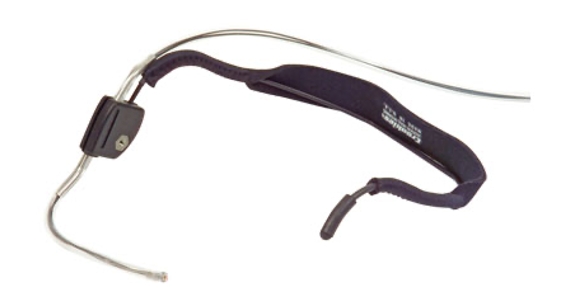
Figure 55. ASL headset mount.
I had a client I worked with once who was able to move their jaw, not their head, consistently to the side. So she wore this headset, and that fiber optic was aimed right at her jaw. With a slight movement, the switch is activated. You can also mount this in Loc-Line, which is shown below.
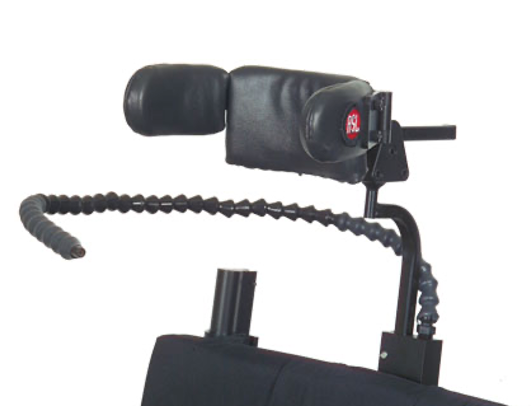
Figure 56. ASL Flex Tube Headrest Switch Mounting.
This is from ASL, it's their flex tube head switch mounting and you can put fiber optic cabling through there. Be careful because if the Loc-Line is adjusted aggressively, you can break the cable inside. You can also use a gooseneck, and that's available from Stealth Products.
- Mounting
- Single Switch
- Splints
- Video
This young man has SMA type I, and he is now in his late 20s. He has decreased movement and can only move his index finger slightly to control a fiber optic switch. He can no longer do so if we mount that fiber optic in his arm pad or a tray because his arm sometimes needs to be in different positions, and he has a lot of deviation in his wrist. Gravity also pulls him out of alignment. We had a splint made and embedded the fiber optic into it.
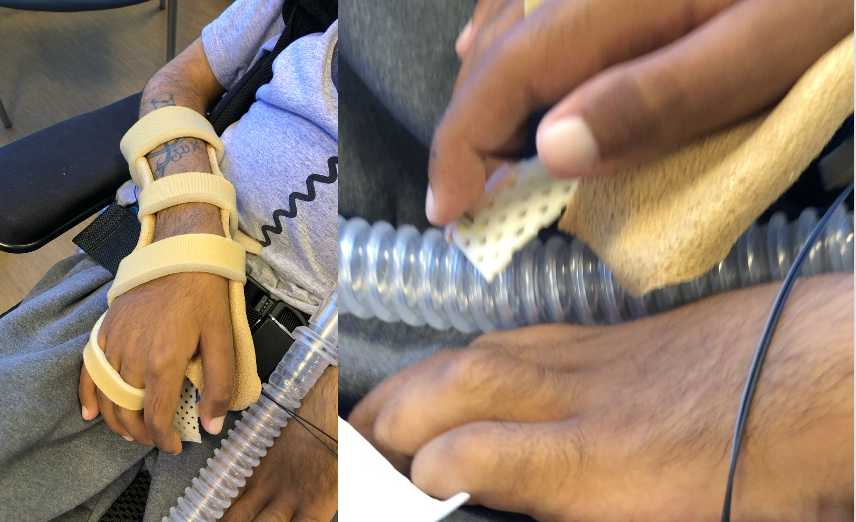
Figure 57. Client set-up for use of a fiberoptic switch.
Video #9: Fiberoptic Switch
Look carefully in this video to see his finger touching the fiber optic switch terminus.
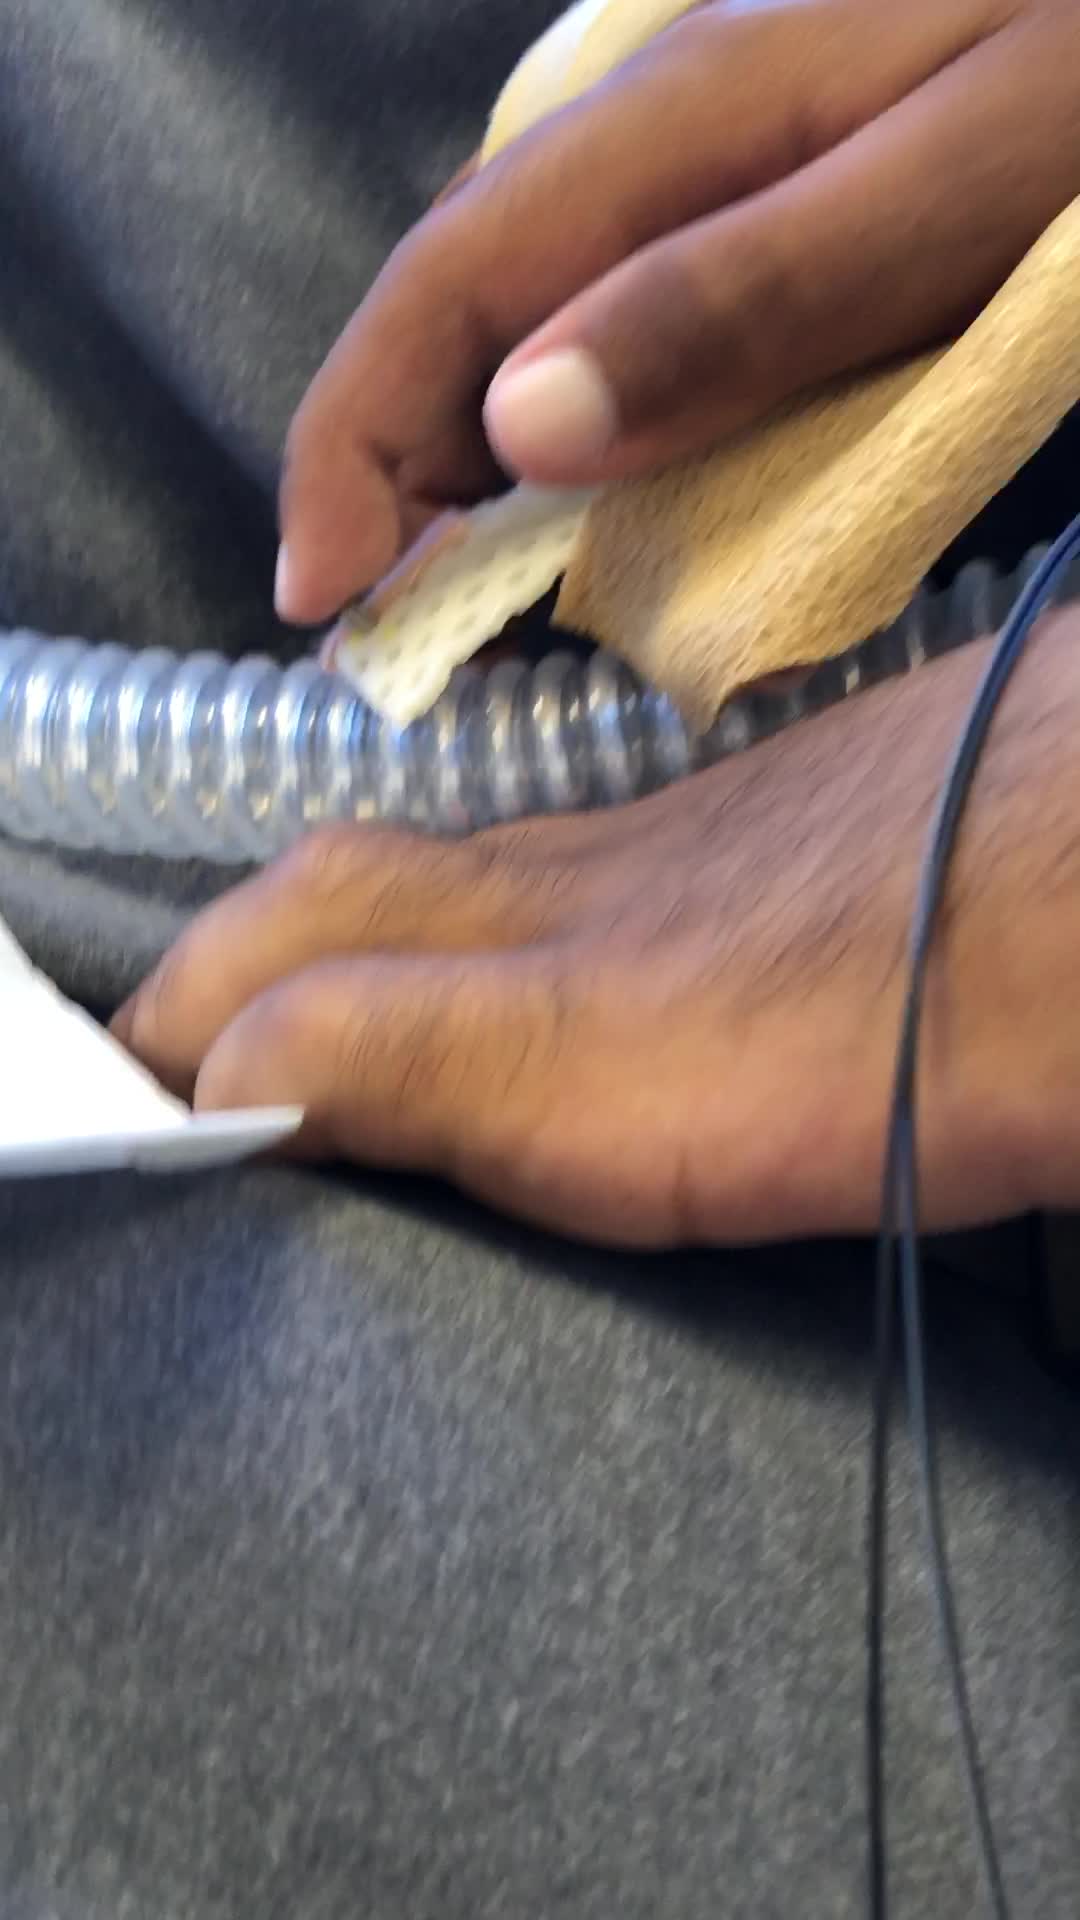
This particular switch can be set in a mode of operation where you have to move away from it to activate it. This allowed this young man to rest his finger on the switch and move away from it when he needed to use his communication device and select specific vocabulary. We chose this option because hovering over the switch was very difficult for him, and he would fatigue quickly.
- Mounting – Single Switch
- Arm trough
We saw these pictures before. This is the same client, but when he was like eight years old. I've been seeing him for a long time. At that time, the fiber optic was mounted in the hand pad of his arm trough, and he used a small movement of his thumb. He also used three other switches at the time for driving
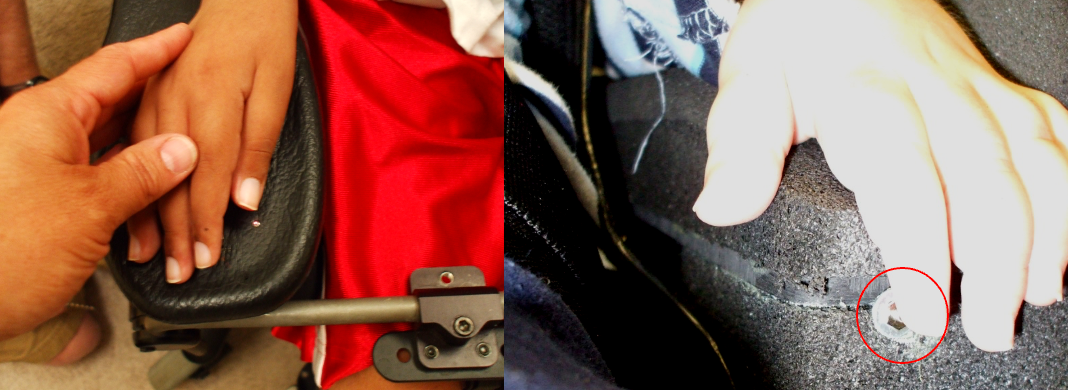
Figure 58. Examples of fiberoptics mounted in arm troughs.
- Mounting
- Arrays
- Hand tray
- Other trays
- Arrays
There are other mounting options as well, as shown in Figure 59.
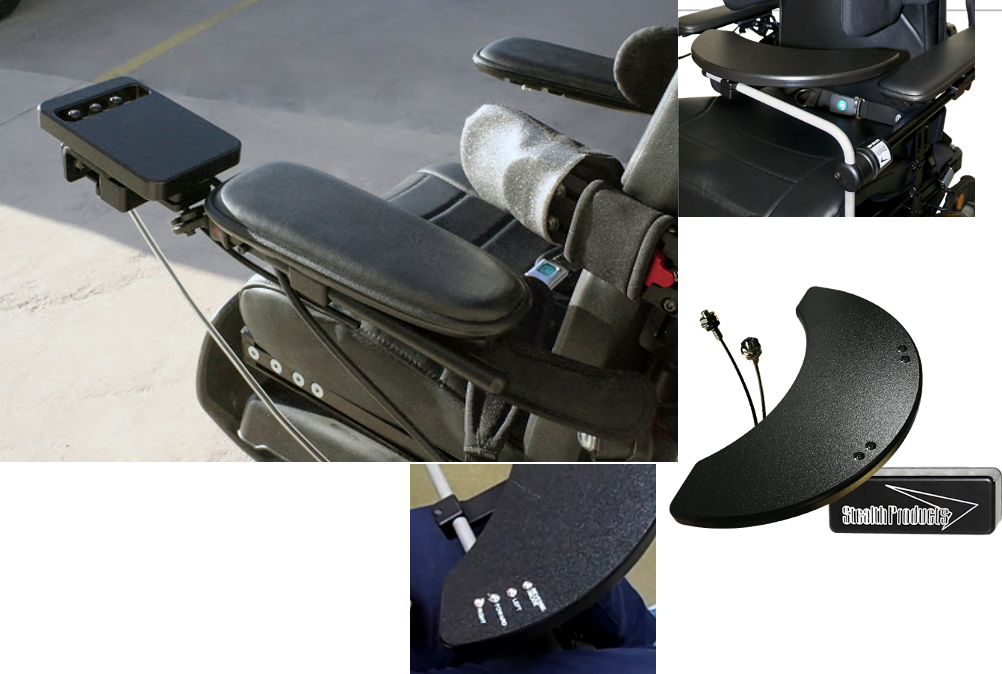
Figure 59. Stealth Products Eclipse tray and Gaitlin mount.
There are hand trays that can support these fiber optic switches. You can see there's some plastic tubing coming out from this hand tray in the top right picture that's holding onto those cables in an effort to protect them; it's just some oxygen tubing. You can also see several options from Stealth, where we have a specialized tray and swing-away mount that can support the switches and the cables. In the lower left, you can see where these are labeled so that the client knows which switch controls what.
Video #10: Fiberoptics on a Tray
In this video, we have someone who works for Quantum Rehab, which is the umbrella over Stealth Products.
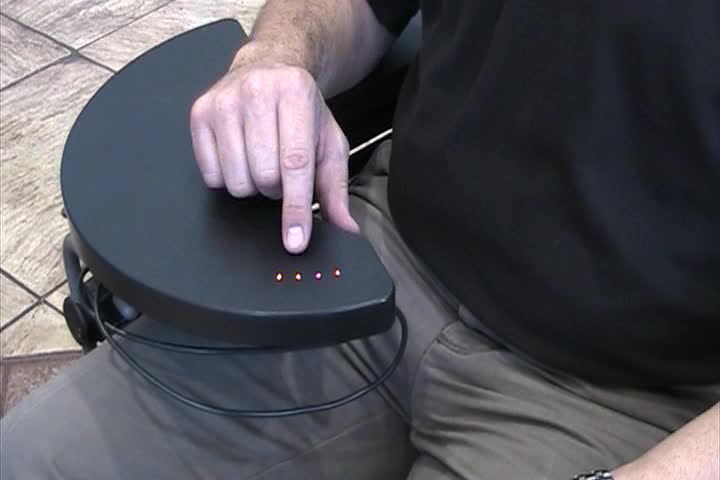
He's hovering over these switches, but he could actually rest his full hand and fingers on the tray if he wanted. By moving back and forth over these switches, he can drive where he wants with an exceedingly small amount of movement in either direction. It's a very powerful technology.
Infrared Electronic Switches
- Enabling Devices
- Eye Blink Switch
- Not appropriate for Power Wheelchair use as switch contact cannot be sustained
- Client must keep head still
- Not typically used for clients with increased tone
We then have infrared switches. This is from Enabling Devices, and it's an eye blink switch (Figure 60).
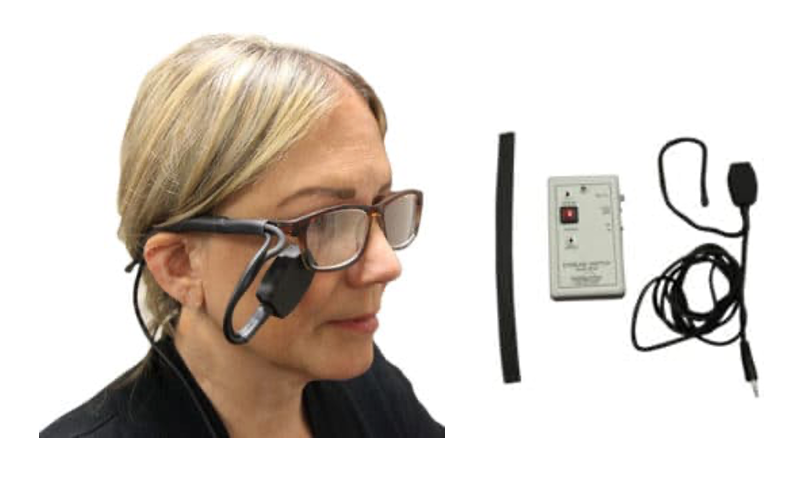
Figure 60. Eye blink switch from Enabling Devices.
To my knowledge, this is the only eye blink switch left on the market. Infrared is safe to have around the eyes. It has to be adjusted and calibrated so that it does not pay attention to our normal eye blinks. Thus, a more intentional eye blink will activate it. It is attached to a pair of glasses.
Touch Electronic Switches
- Respond to Touch
- Activation with skin
- Power is not required
- Adaptivation Taction Pads
- Flexible material
- Can be attached to anything
We then have touch switches, and these are activated with contact with the skin. If someone was wearing gloves, for instance, these would not activate. Power is not required on these. The most common example is the Adaptivation Taction pads (Figure 61).
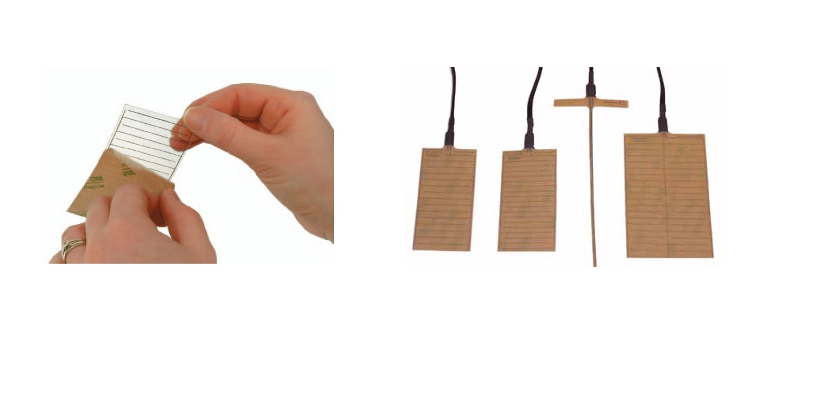
Figure 61. Examples of touch switches.
These are very interesting. You peel off the backing, and you attach them to whatever you want. It could be the surface of a tray, it can be around a water bottle, it can be whatever you want. When that person contacts the material, they activate the switch.
Sensor Electronic Switches
- A sensor picks up muscle activity.
- Not recommended for power mobility as the vibration of the power wheelchair may activate the switch.
- Designed for intermittent, not sustained, contact
Sensor switches are where we start getting into very complex switches. These are last resort switches, as they're expensive, fussy, and need a lot of calibration. If we can find something that's easier, we want to start there first. And, these are not recommended for power mobility. Neither are eye blink switches because the vibration of the chair may activate the switch. These are designed for intermittent, not sustained contact, the same as eye blink switches.
- Enabling Devices
- Manual calibration
- Sensor often placed above eyebrow
- ‘grimace’ activates switch
There's one old-school sensor switch left from Enabling Devices, shown in Figure 62, but there used to be far more.
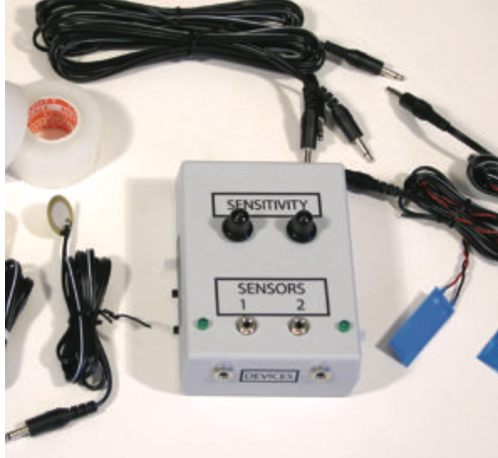
Figure 62. Sensor electronic switch by Enabling Devices.
It requires lots of calibration, and the sensor is often placed above the eyebrow. If somebody grimaces or raises their eyebrow, this will activate the switch. It is fussy.
- More sophisticated Sensor switches use EMG to measure muscle activity
- Very expensive and require calibration
- Last resort switch
- Tinkertron EMG Switch
- Control Bionics Neuronode EMG switch
We have two other sensor switches that are available right now, as shown in Figure 63.
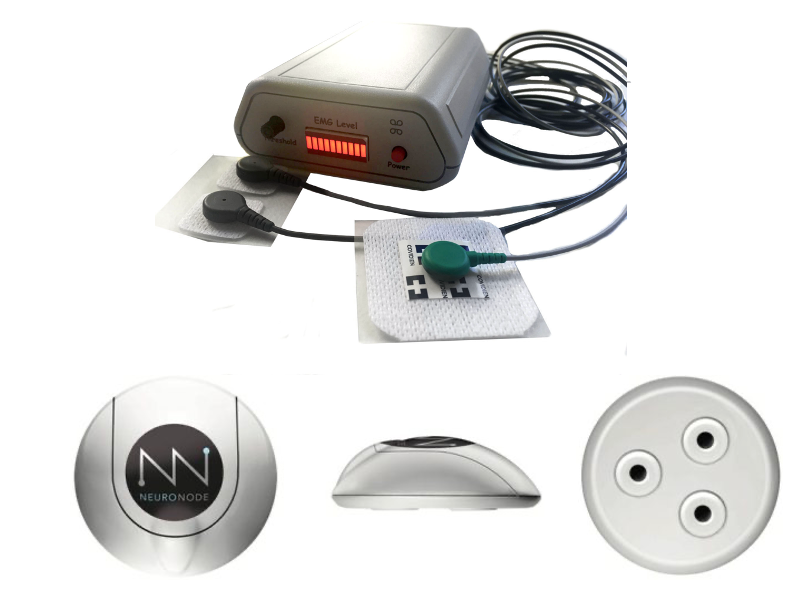
Figure 63. Two other sensor switch options.
These do tend to go on and off the market a little bit, but they are very sophisticated and expensive. The first is the Neuronode EMG switch (pictured below). It literally picks up the activity in the muscle, and if it changes enough, based on our calibration, the switch will be activated. The one above is the Tinkertron and is also an EMG switch. To set this up, people need to be highly trained and willing to keep recalibrating the switch, probably every time it's set up for a client.
Piezo Electric Flim Electronic Switch
- The vibration of a piece of film causes activation
- Calibration of sensitivity required
- Not recommended for power mobility as vibration of the power wheelchair may activate the switch.
- Intermittent, rather than sustained, contact
We're going to wrap up with Piezo Electric Film. This looks like a piece of plastic wrap that you put over your leftovers, and it, when vibrated, activates the switch. You have to calibrate how much vibration is required in order to activate the switch. It is also not recommended for power mobility either because vibration can set it off, and it's not designed for sustained switch activation.
- Adaptivation
- TableTapper
- Also, a switch latch and timer
- Enabling Devices
- Twitch
- Can be used at eyebrow
Figure 64 shows two of the options, both from Enabling Devices.
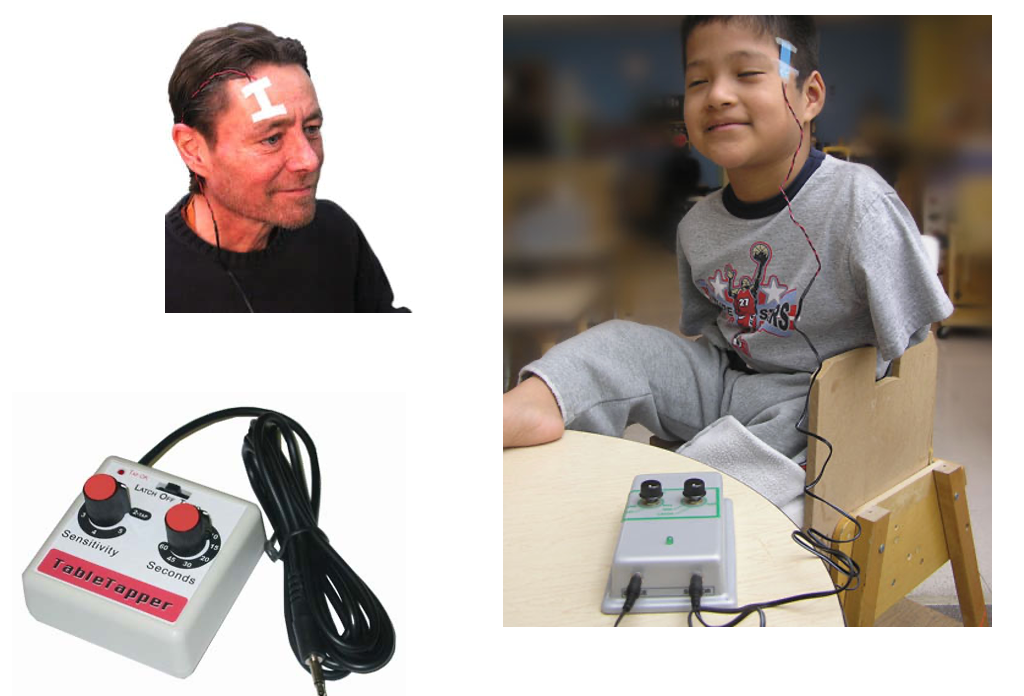
Figure 64. Examples of Piezo Electric Film switches from Enabling Devices.
One is from Broadened Horizons and Adaptivation called TableTapper. When you tap the table next to this box, it vibrates the piece of film inside, and it will activate the switch. This also incorporates a switch latch and timer that allows that momentary switch activation to be changed to latched or sustained for a certain amount of time.
Enabling Devices has some of this Piezo film in a Twitch switch. You can see this attached to the side of this young man's face. When he smiles or frowns, it wrinkles that film a little bit, and that's going to cause activation. The upper left picture is activated when someone raises their eyebrows like those sensor switches. It requires calibration, but it's not as fussy as the sensor switches.
Question Time
- Ok, I have a switch in mind that I think might work for my client
- How do I get one to try out first?
- State Assistive Technology Programs
- Loan banks
- Schools
- May have a loan bank or some evaluation switches
- Manufacturers may have a loan program
Perhaps you have a switch in mind, and you think it might work for a client. How do you get one to try out? If you don't have access to switches, you can look at your budget, and see if there are some switches you can start collecting to do these evaluations. You can also reach out to your State Assistive Technology Program. They often have loan banks where you can borrow switches for a period of time and try them out. Schools may have their own loan bank as well, or some evaluation switches lying around. Additionally, some manufacturers may have a loan program as well.
Hopefully, earlier, you wrote down an idea of where you might want to try a switch with a client. Now, write down what switch type or types you think might work for the client that you identified.
A common question people have is funding. Can I get funding for switches? The good news is yes, most state Medicaid programs and insurance companies will pay for switches. They're justified as providing an alternative means of control when physical limitations preclude standard means of control or other access methods that are available for that assistive technology. It is important to make sure that you don't forget how you're going to secure the switch, so include mounting in your justifications as well.
Take Home Message
- There are many potential switch sites to provide optimal switch use
- There are many switch types available to match individual need
- Optimal switch access is very dependent on optimal positioning
- Optimal switch access is dependent on switch training
- Optimal switch access can make or break AT use and subsequent function, participation, and socialization
There are a lot of places you can put a switch on someone's body to provide that optimal switch access and use. There are also many switch types available as well, thank goodness, so we can also meet an individual's needs. Optimal switch access is very dependent on optimal positioning. Thus, it is important to work with the seating team if that's not something that you do in your job. The whole process is dependent upon switch training. Optimal switch access can make or break whether someone can use their assistive technology and as a result, be functional, participate, be able to socialize with others.
Questions and Answers
Can all of these various switches be considered and programmed for other uses besides driving a wheelchair?
The switch is a tool, so it's something that can be used as a part of driving a power chair, to control a communication device, to control a tablet and apps on it, and to control a wide variety of assistive technology. For example, if you have someone who does not want to control a smart light switch, most likely, you're not going to use a switch for that.
Switches used to be used with an older technology that's very rarely used anymore called environmental controls or Electronic Aids to Daily Living. Those systems are primarily being replaced with the ability to control smart lights through things like Alexa or Google Home or through apps on our tablets or smartphones. Switches can be used to control our smartphones or tablets.
Is it just pressure to activate, or is circulation a factor?
Pressure is required in those mechanical switches. I think that if someone had poor circulation, such as with Reynaud's phenomenon, it shouldn't be a problem. The person may not have as much sensation at times, but circulation should not affect the pressure they can exert.
Could you use multiple switches instead of one for people whose tone makes it difficult to use in one spot?
That's a great question. Sometimes we need to find more than one switch site depending on the type of technology. For example, sometimes, with communication devices, someone will use more than one switch to scan through their vocabulary choices. In general, if I can find one switch that works for the client and use that consistently, that allows the client to develop more of that automaticity, and if we move the switch around too much, that can be more difficult. With that said, I have worked with a few clients who have more than one switch site. And, if one switch site isn't working as well for them that day or leading to fatigue, they can change over to the other.
When assessing a person with a progressive disease, would they need to come periodically throughout to update the switches?
When we have progressive conditions, access can definitely change. It could change to a different switch location, a different switch, or even a different access method. I do not typically provide switches for future use because I just don't know what that future use is going to be, but I will see those clients periodically as their access needs continue to change.
Needs may also change as kids grow or have different medical procedures. I often look at slight changes, not only major changes, in their access method. Technologies change too. Lastly, clients who couldn't use an access method in the past may be able to use a newer option now.
Do they all require some type of pressure?
Mechanical switches require force, and electrical ones do not. You can place a switch just about anywhere as long as that client has volitional control of it. I see a lot of very difficult clients, and I often have to dig really deep to find a good location. Probably the most unusual spot that I ever placed a switch was in front of someone's stomach. I was working with a young girl, and I could not figure out a spot for a switch anywhere. Her grandma asked if she could go ahead and give her her feeding through her tube because it was taking a little while. I said, "Sure, it'll let my brain cool off." I think I had smoke coming out of my ears. While she was getting her feeding, I noticed that as the formula was moving down the tube, this little girl would make a funny face, and the formula would stop. Grandma would say, "You stop that right now." The little girl would relax, and the formula went down. It was the only thing this young girl could control. She could stop her feeds at will by contracting her abs. I took a Jelly Bean switch and placed it facing her belly, and I put some Velfoam around her trunk. Sure enough, she could hit that thing. It looked like one of those 1995 ab workout machines that you could get on TV, but it worked for her.
In the example of the girl who was startled by the fire alarm and lost control and crashed, was the school amenable for you to come back in and try options? I would imagine that sometimes they're very leery to give the person another shot or try new equipment.
The school was concerned about her wheelchair, a 350-pound vehicle careening down the hallway. As I mentioned, this young girl was very nervous, as were her parents, but she was a very successful driver. Even though she hadn't crashed in the three years she'd had a chair, we needed to find a spot where she would be safe in case any future startle situations came up. Fortunately, we did find a safe spot.
Do you have a standard way that you follow up with these folks to see how things are going?
Once we find a potential switch site and switch type, and the equipment is received, I let them know I want to see them again. We then see if any switch training is required and work with other team members as needed. If we're using the switch to control a communication device, for example, then I'm going to work with speech-language pathologists and look at all the various programming on that device to optimize the use of the switch. We work together on that.
I also make sure that the family, the client, and the other professionals working with them know that if they notice this person's having difficulty accessing the switch where they weren't before, to please reach out because I may have no idea that there's a problem, like the example I gave of Jacob where the tray was raised. Unfortunately, I did not know that he could not use his switch until about two years later. Someone finally referred him back, and we were able to fix the problem in five minutes.
If I have a client where I think a new technology might be helpful for them, we might ask them to come back in as well. For example, i-Gaze used to be much more difficult to control than it is now. You had to keep your head perfectly still. I-Gaze is a lot more forgiving now, and some people who had to rely on switch use before could perhaps use i-Gaze now. It is always important to keep in mind new options, as assistive technology is always changing.
What about switches off of the internet?
Switches from sources like Amazon tend to break easily. They also require a great deal of force to activate. I've had a number of families who have purchased these, and we end up having to replace them with something else anyway. Families are also under the impression that they have to buy these things on their own, but we're happy to write up the documentation and get funding approval.
Can you explain how Sip 'n Puff works again? Why is breath control not needed for it?
Sure. If I was blowing through a straw, blowing a whistle, or sipping my milkshake, that might require more breath control, breathing in, breathing out. But, we're able to control air pressure within our mouth. If you can puff out your cheeks and hold them there, or suck in your cheeks and hold them there, you are controlling the air pressure within your mouth. These switches respond to changes in air pressure. As a matter of fact, in order to drive a power chair, usually four different levels of air pressure in the mouth are required. These are called hard puff, soft puff, hard sip, and soft sip. The client has to be able to distinguish between each of those in order to drive the chair effectively. So, it's air pressure, not breath control, and that allows someone even who is on a ventilator to successfully use that switch.
Citation
Lange, M. (2023). Switch assessment: Determining optimal switch type and placement. OccupationalTherapy.com, Article 5625. Available at https://OccupationalTherapy.com