Krysta: Thank you all for joining me, and for taking an hour out of your busy day today. I also want to thank the OccupationalTherapy.com team for allowing me to present on this topic. I discovered kinesio tape a while back, and I found it to be a very useful, low maintenance, and inexpensive modality to use with patients.
Introduction
Elastic taping is often used to facilitate the body's natural healing process. In addition, it provides support and stability to muscles and joints, without restricting the body's range of motion. Taping can help to reduce pain, especially with movement, facilitate lymphatic drainage, and promote blood flow and circulation. With adolescents, taping can be used to cue the muscles into proper position, while the body grows and develops. This course was developed from three adolescent case studies, conducted by myself, over the past few years. These case studies include: an infant with torticollis, an eight-year-old boy with a hairline fracture of the clavicle, and an 18-year-old female with back pain, caused from mild scoliosis. In each of these case studies, the goal was to reduce pain with movement. By utilizing these kinesio taping principles, I was able to achieve my goal in each of these case studies. At the end of this course, learners will be able to identify the physiological benefits of therapeutic taping applications, identify five commonly used tape cuts and applications, and identify key properties of kinesio tape. We will begin by reviewing the history of therapeutic taping, and how kinesio tape came to be a popular and effective modality. We will cover theory, technique, clinical implications, review the three case studies, and then quickly discuss billing for this modality, before wrapping up with any questions that you may have.
History of Taping
There are a few different kinds of tape available on the market right now. The most common are rigid and elastic tapes (see Figure 1).
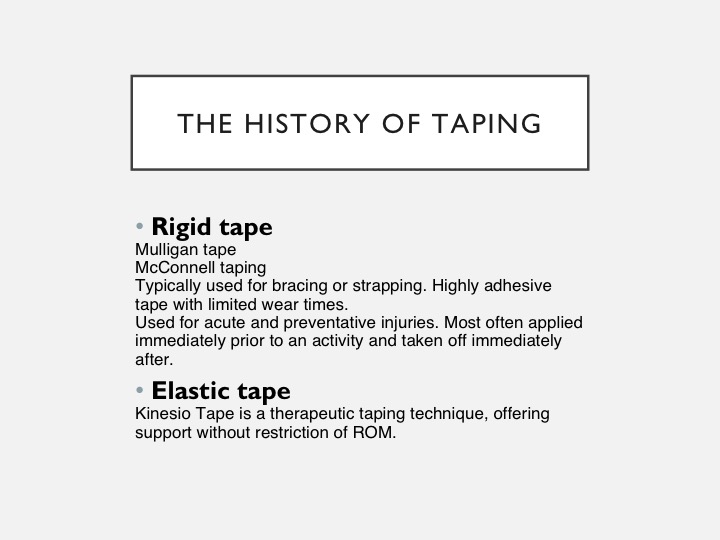
Figure 1. Rigid vs. elastic tape overview.
For the sake of time, I am just going to cover three of them. Mulligan and McConnell tape are considered to be more rigid. Typically, they are used for bracing or strapping, are highly adhesive, and have limited wear time. Rigid tape is used for acute and preventative injuries, and is physically applied right before activity, and removed immediately after. Kinesio tape was developed to be a therapeutic taping technique, which offers support without restricting range of motion.
Mulligan Tape
Brian Mulligan, from New Zealand, was the inventor. He developed this taping technique in 1985, The Mulligan Concept came about to support his Mobilization With Movement Theory. Mobilization With Movement (MWM) is a manual therapy approach, designed to reduce musculoskeletal pain. The goal was pain free, active movement. While developing the MWM approach, Mulligan discovered that treatment was often enhanced with tape to compliment the directional forces provided. Tape is applied in a direction, which adds to the MWM approach.
McConnell Tape
The McConnell Taping Method was developed by Australian Physiotherapist, Jenny McConnell. This taping method is intended to act as a brace alternative, and it has limited therapeutic function. This method requires two types of tape, a cotton mesh tape as a base, followed by a brown rigid tape. The primary use of this taping method is for orthopedic injuries such as a patellar femoral dysfunction, shoulder subluxation, and lumbar, foot and hip pain. This tape can only be worn for up to 18 hours, due to adverse skin reaction. This tape technique is very effective to provide an external brace or stimulus for proper positioning. It is a really excellent technique to use if you have an appropriate patient.
Kinesio Tape
In 1973, a chiropractor, named Dr. Kenzo Kasa, developed the idea for therapeutic taping to use with his patients. He found that one of the primary complaints from his patients was pain. He wanted to develop a way to relieve pain without medication. His concept was to reduce the build up of fluids between the layers of soft tissue and decrease the temperature that resulted from edema. He thought that by lifting the skin, the interstitial fluids would flow more normally through superficial lymphatic vessels, decrease the build up fluid pressure around the muscles, and would cause improved muscle function, and therefore reduce pain. Olympian Kerri Walsh made kinesio tape popular, during the 2008 Olympics. Since then, it is pretty common to see athletes, from Olympians to football players out on the field, wearing kinesio tape. The tape comes in several colors, which were chosen to follow the color therapy principles. For example, the blue tape is intended to be used over areas that you would ice, and the red or pink tapes are intended to be used over areas that you would apply heat to. The Kinesio Taping Method was developed as a guide to addressing common injuries. What sets kinesio tape apart from other methods, is that it can be used to treat acute, sub-acute, and chronic pain. It is, as far as I know, the only tape that allows full range of motion, and it is meant to facilitate. It can be easily combined with other therapies.
There are many different brands of elastic tape available for use, you can find them at the drug stores, and athletic stores, and online. I encourage you to try a few of them, and find out which one best suits your patients' needs. I chose to use kinesio tape in these case studies, because I liked the properties of the tape, and it seemed to last the longest.
Kinesio tape properties.
The first is the stretch and recoil. This means that the kinesio tape is designed to stretch between 40% and 60% of its resting length. A 10-inch strip is going to stretch out to about 14 to 16 inches. This design was intended to mimic natural movement, and have the stretch capabilities of the skin, in areas such as the knee, elbow, low back and cervical spine, where you see the most range of motion. Fingerprint technology, is the wave pattern in the tape that increases the micro-stimulation to the epidermis. This assists with lifting of the skin. It is waterproof, and the material is coated with a water resistant protectant to resist the penetration of moisture. This allows users to shower and swim with the tape on, and still wear it afterwards. It is 100% cotton, and the cotton fibers allow for a longer wear time. It is latex free made of a medical grade and heat sensitive acrylic, so it is less irritating to the skin. Most importantly, it allows full range of motion, which is the main idea behind the method.
Theory
Taping alleviates pain and facilitates lymphatic drainage by microscopically lifting the skin. The taped skin forms convolutions, which increases interstitial space. The result is that pressure and irritation are taken of the neural and sensory receptors, alleviating pain. Pressure is also gradually taken off the lymphatic system, allowing it to drain more freely. Here is an illustration to help you better visualize the process in Figure 2.
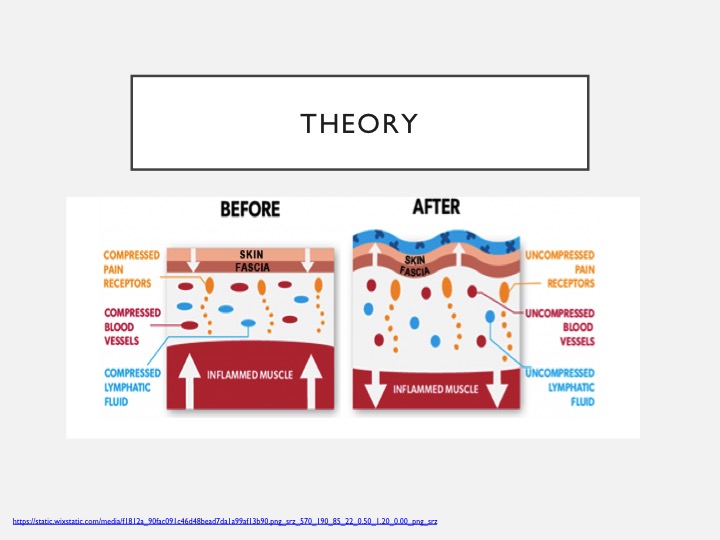
Figure 2. Before and after taping example.
As you can see, once the tape is applied, and the skin is lifted the pain receptors, blood vessels, and lymphatic fluid become less compressed, which decrease the amount of inflamed tissue, fostering improved range of motion, and decreasing overall pain. I have also included a slide to go over tape tension, as shown in Figure 3.
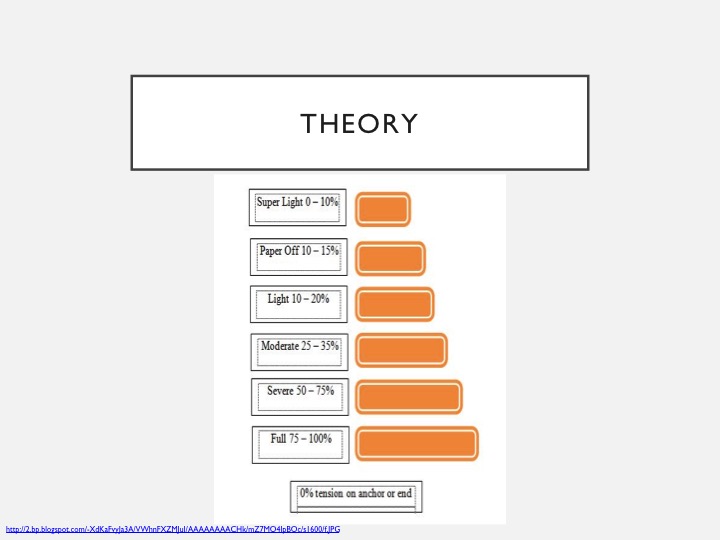
Figure 3. Amount of tension.
Figure 3 goes over the amount of tension applied to your tape and will make a difference in the result that you get. Tension varies from super light to full. Super light, for example, may be used with a Fan Cut, which we will review in more detail in a bit. This can be used to facilitate lymphatic drainage. An I Strip, which we will also cover, when used with full tension would be used for a space correction technique. There are many kinesiotaping concepts, but for the purpose of this course, and how it relates to the case studies, we will just cover two of them.
Inhibition Concept
The first is the inhibition concept. By applying the tape from insertion to origin, with paper off to light tension, which is about 15% to 25% of available tension, the recoil effect of the tape stimulates the muscle to elongate to a more normal length. If you have a patient with shortened muscle, especially from an acute injury, your goal would to be elongate the muscle, and keep it in that position so that it can heal properly. You will see this concept used successfully in one of the case studies.
Facilitation Concept
The second concept we need to cover is the facilitation concept. When muscle is weak, the motor point is distant from the center of the muscle. By applying tape from origin to insertion, with paper off to moderate tension, which is 15% to 35%, the recoil effect of the tape, or the direction that the tape bounces back to, is going to stimulate the muscle to shorten to a more normal length. If you have a chronically weakened and stretched out muscle, the goal is to shorten it back up. You will see this concept applied to one of the case studies as well.
Relating to Children
When it comes to children, kinesio tape is very safe to use and extremely beneficial. It is a painless application process; they can wear it for days at a time without getting in the way of bath time or play. Tape can be adjusted as they grow, by simply cutting longer pieces. It is colorful, and fun to wear, and if you are a creative practitioner, you can cut designs into your tape and make it a little bit more personalized. Most importantly, it can be a great cue for babies who are still developing muscular control and are unable to make a conscious effort to contract and hold a certain muscle or a specific position.
Some commonly treated, generalized conditions in children include gross motor development delays, low muscle tone, and decreased coordination. We will look at a very specific condition, in one of the case studies, to make this more relatable.
Terms
Now we need to review terms so that you can better understand the case studies (see Figure 4).
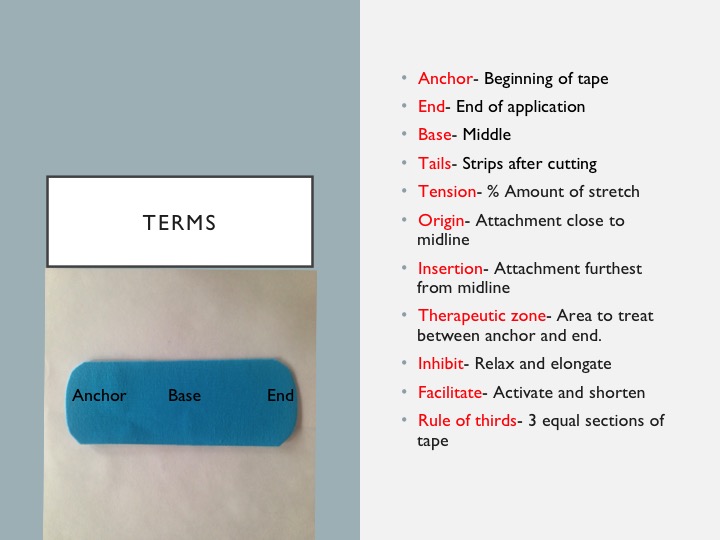
Figure 4. Overview of terms.
Anchor is the first piece that attaches to the skin, and it is always applied with zero tension. End is the last part of the tape that is also applied with zero tension. Base is the middle of the tape, while the tails are part of the tape that is strips after cutting. Tension is the amount of stretch put on the tape. Origin is your tissue attachment, closest to midline. Insertion is your tissue attachment furthest from midline. Inhibit is to relax and elongate a muscle. Facilitate is to activate and shorten a muscle. Rule of thirds is sectioning the tape into equal thirds to ensure proper technique. In the picture, you can see the anchor, base, and the end.
Techniques
There are several techniques that can be applied for a variety of diagnoses. Today, I am going to briefly cover five of them. They can be referred to as either cuts or strips. These include the I Strip, Y Cut, X Cut, Fan Cut, and Donut Cut. Once you have your patient and diagnosis, you then decide on a concept and appropriate cut that can be used. This can vary, depending on what you want to achieve, and whether you are addressing an acute or chronic injury. Let me show you some examples of the cuts.
I Strip.
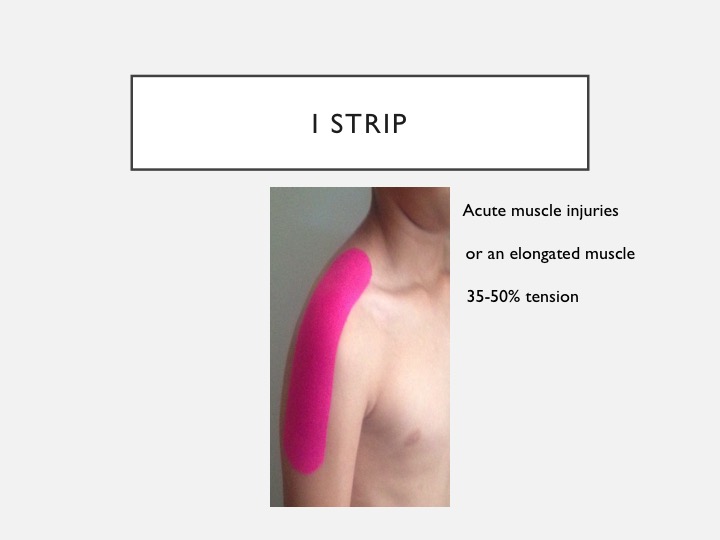
Figure 5. Example of an I Strip.
This is an example of an I Strip application. I Strips are used for acute muscle injuries, or elongated muscles, like the erectors in the back. This particular application in Figure 5 is one that I use a lot to prevent shoulder subluxation. I Strips allows for the most tension, between 35% to 50% in most cases.
Y Strip.
Here is the Y Strip. This can be used through all phases of injury.
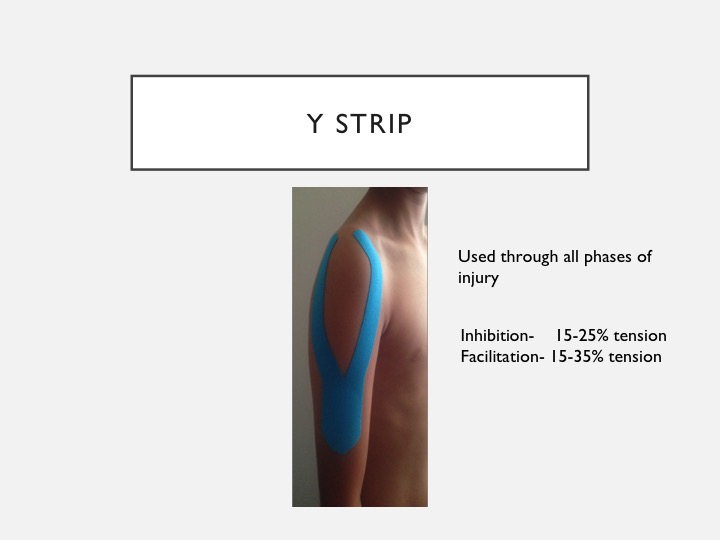
Figure 6. Example of a Y Strip.
This is a good application for inhibition or facilitation, but it does allow for less tension than the I Strip. This application here I have used for a deltoid strain in athletes.
X Strip.
The X Strip is used for muscles that cross two joints, and does not require any tension.
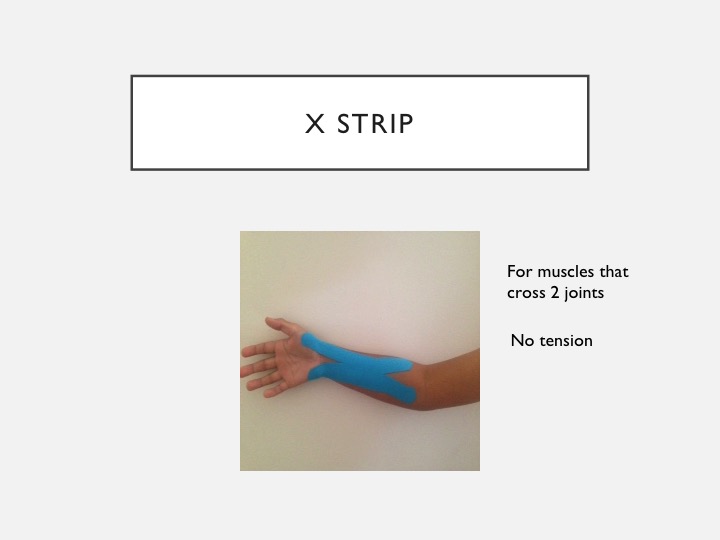
Figure 7. Example of an X Strip.
This application is used for carpal tunnel, and it can easily be combined with an I Strip around the wrist to give a little more support.
Fan Cut.
The Fan Cut is used for edema. The crisscross pattern you see here in Figure 8 allows for fluid to flow easily between the spaces, where the tape has lifted the tissue.

Figure 8. Example of a Fan Cut.
I have used this application on bruises many times to reduce the size and discoloration. Sometimes you can see that overnight.
Donut Cut.
Finally, the Donut Cut can be used for pain. The hole goes directly over the area of pain.
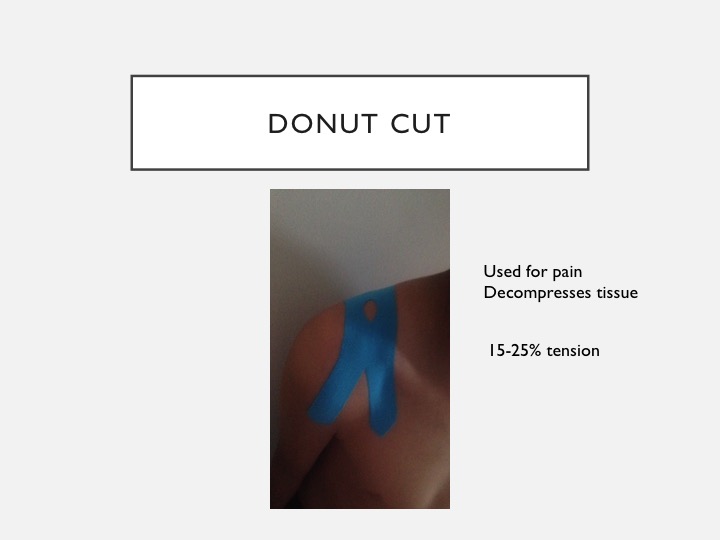
Figure 9. Example of a Donut Cut.
This one I have utilized for shoulder pain caused from purse straps or backpack straps.
Instructional Video
I have a video prepared for you to show you how to cut out the strips, and to provide you with a couple of extra little tips.

Identifying Appropriate Patients
Identifying appropriate patients is the most important and first step when utilizing any modality. The evaluation process will be discipline specific, but it should always include a skin assessment, assessment of joint mobility, and manual muscle testing. You want to check for any precautions and contraindications, and once you have made the determination that taping is appropriate, you should educate your patient and caregiver on the tape, what it does, what it is being used for, how to remove it, and any adverse reactions. It is important to make sure that the person you are taping can remove the tape himself or herself, or has a caregiver that can remove it for them. And with our little ones, you want to make sure that you have permission to use the modality from the parents.
Indications
- Improve fluid circulation
- Neuromuscular re-education (proprioception)
- Prevent injury or progression of injury
- Improve ROM
- Reduce pain and inflammation
You can tape to improve circulation, neuromuscular re-education, injury prevention, or to prevent an injury from getting worse. You can tape to improve range of motion, and you can tape to reduce pain and inflammation.
Contraindications
- Cancer
- Cellulitis
- Open wounds
- DVT
Precautions
- Previous skin reaction
- Kidney disease
- Diabetes
- CHF
You should never tape someone with the following conditions: cancer, cellulitis, open wounds, or DVT. You do not want to tape directly over, or proximal to malignant areas, due to the risk of spreading cancer cells. You can, however, treat a different part of the body with tape. With cellulitis, there is a risk of spreading the infection, as the tape does facilitate fluid movement. You do not want to tape over any open areas as it can change the way that the wound heals. Taping over a DVT can cause the blood clot to break free and to travel.
Remember that contraindications and precautions are two different things. Contraindications are reasons to absolutely never tape, while precautions are reasons to use caution when you are taping. Precautions include a previous skin reaction, kidney disease, diabetes, and CHF. A reaction could have been related to a medication or even just sensitivity of a particular area of skin so you can go ahead and try some milk of magnesia on the skin as a barrier right before you put the tape on. Many times, that is all that is needed to help with any skin irritation that somebody has had in the past. With kidney disease, it depends on the severity. Some patients may not tolerate the fluid movement that the tape provides. Skin integrity and deceased sensation are the main concern with diabetic patients. With congestive heart failure, the risk is with fluid movement and medical stability of that particular patient. Always consult the physician if you are not sure.